
Connect AWS
ScrinCloud connects to AWS by assuming an organization-owned IAM role. The guided flow generates an External ID for the role trust policy; it does not ask you to paste AWS access keys into the browser.
- Typical time
- 15–25 minutes
- You need
- AWS IAM and ScrinCloud admin access
- Next step
- Test and activate
Before you begin
Section titled “Before you begin”Confirm the target AWS account, approved environment, required regions and services, and the minimum permission level. Ask your cloud security team to review the IAM role and trust policy before activation.
Step 1: Start the AWS connection
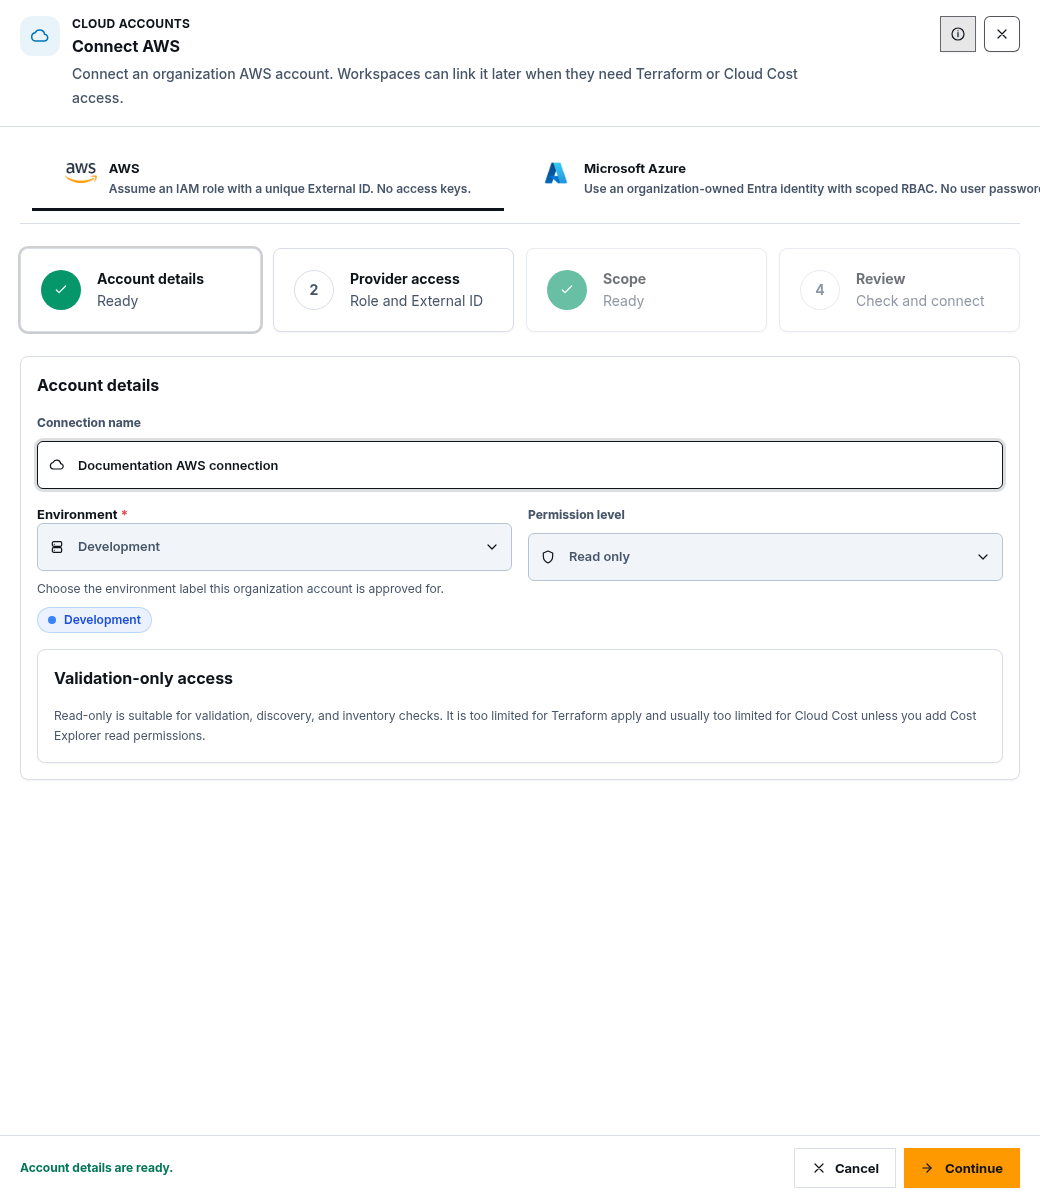
Section titled “Step 1: Start the AWS connection”- Open Cloud Accounts.
- Choose Connect AWS.
- In Account details, enter a synthetic-friendly connection name.
- Choose the approved Environment.
- Set Permission level to Read only, Plan only, or Plan + apply.
- Choose Next: Provider access.
Step 2: Configure IAM trust
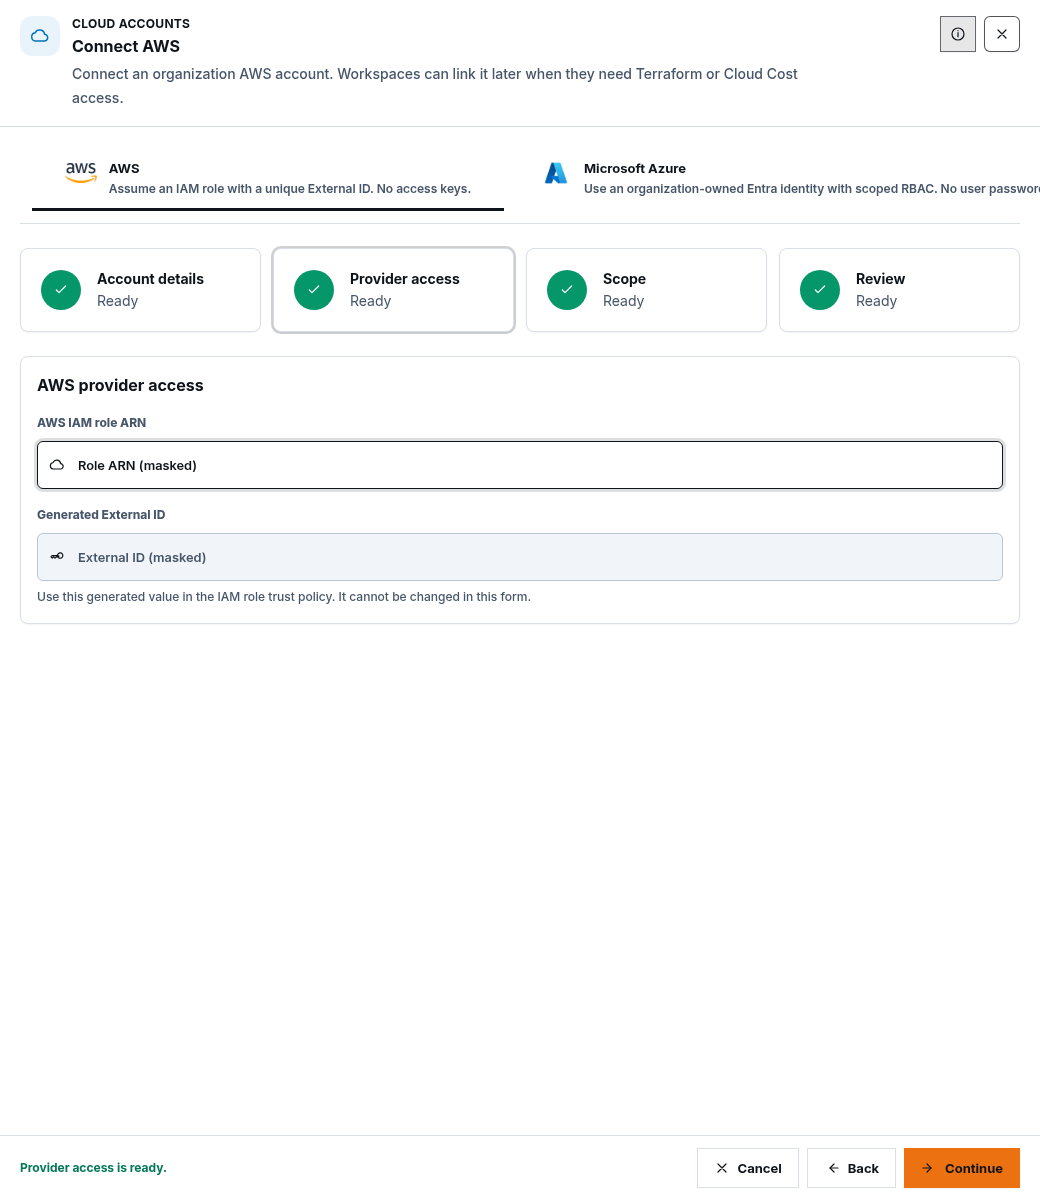
Section titled “Step 2: Configure IAM trust”The AWS provider access step shows:
- AWS IAM role ARN;
- Generated External ID; and
- an AWS setup guide opened from the information control.
In AWS:
- create or select a dedicated IAM role;
- trust only the ScrinCloud principal shown by the current setup guide;
- require the exact generated External ID in the trust policy;
- attach only the permissions needed for the selected mode; and
- keep trust and permission policies under your normal review process.
Return to ScrinCloud and enter the IAM role ARN. The generated External ID is read-only in the form.
Step 3: Limit account scope
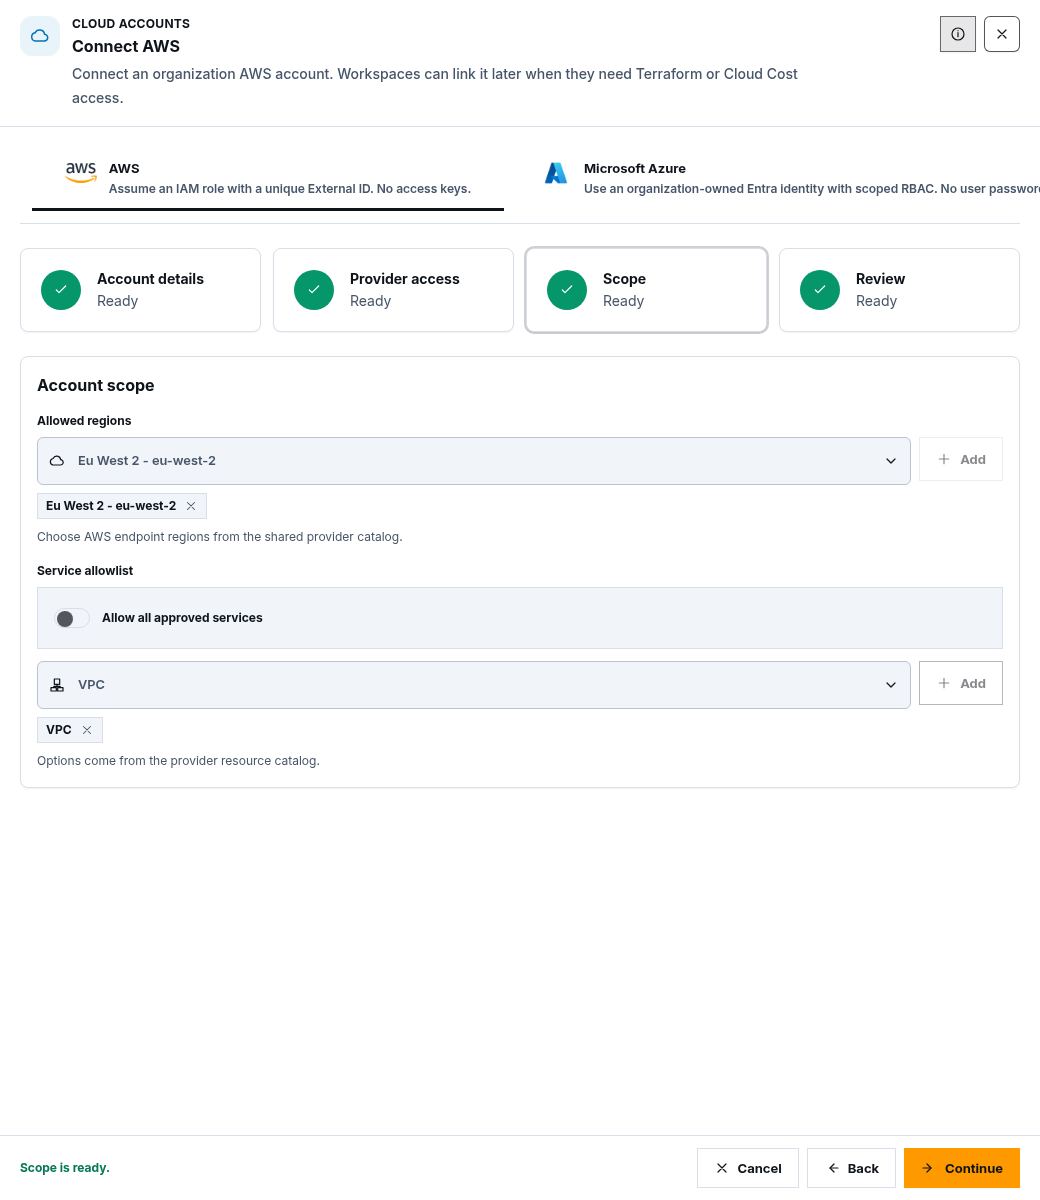
Section titled “Step 3: Limit account scope”- Open Scope.
- add only approved Allowed regions;
- leave all supported services enabled only when policy permits it; otherwise select the required services; and
- remove regions and services outside the connection’s purpose.
Step 4: Review and save
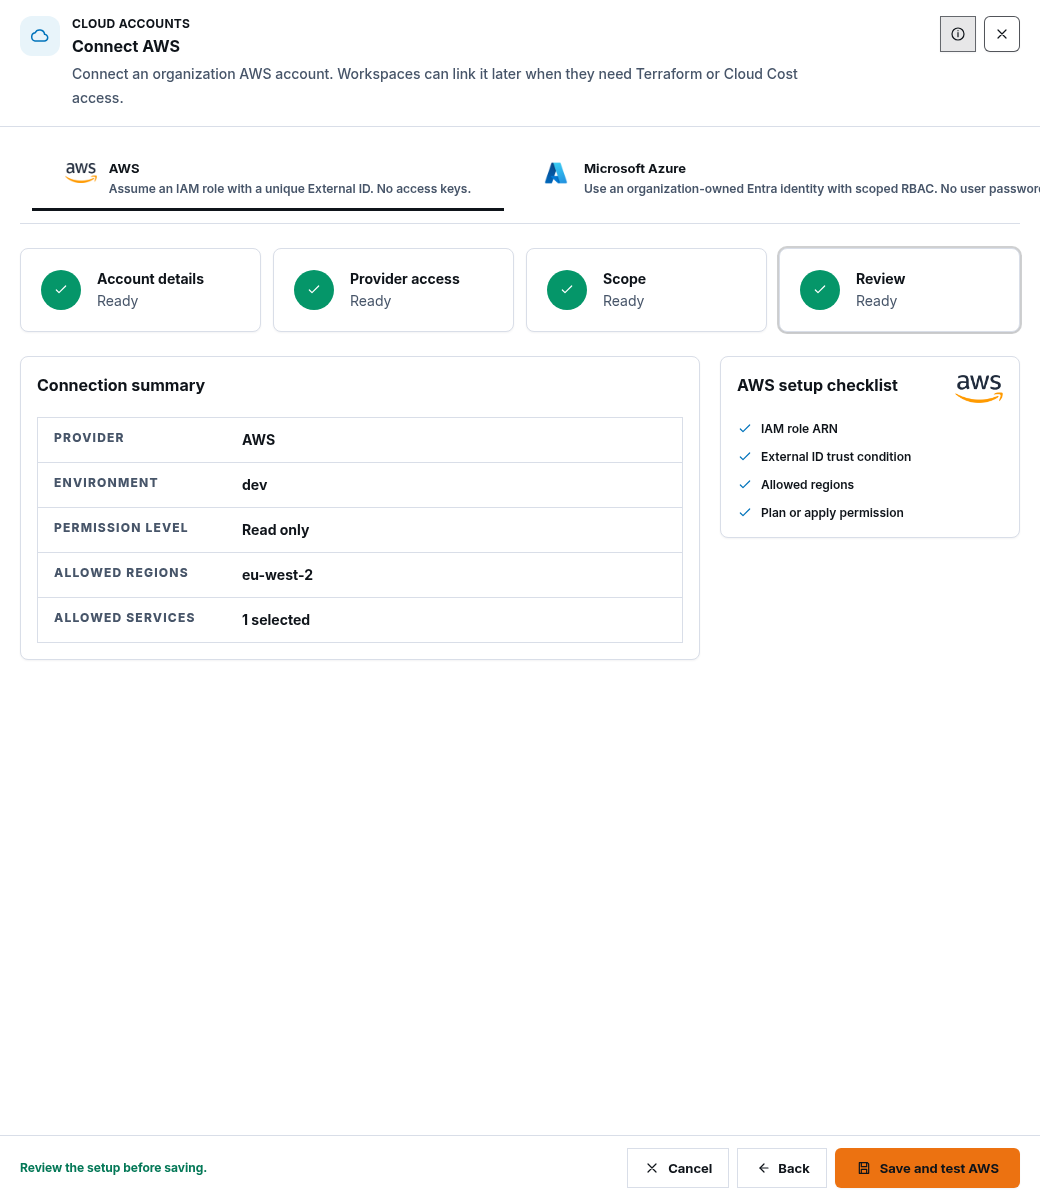
Section titled “Step 4: Review and save”Review the environment, permission level, IAM role method, regions, and service scope. Choose Connect AWS to save the connection.
Saving does not make the connection active. If setup or trust is incomplete, the saved record remains pending and shows what needs attention.
Step 5: Test, verify, and activate
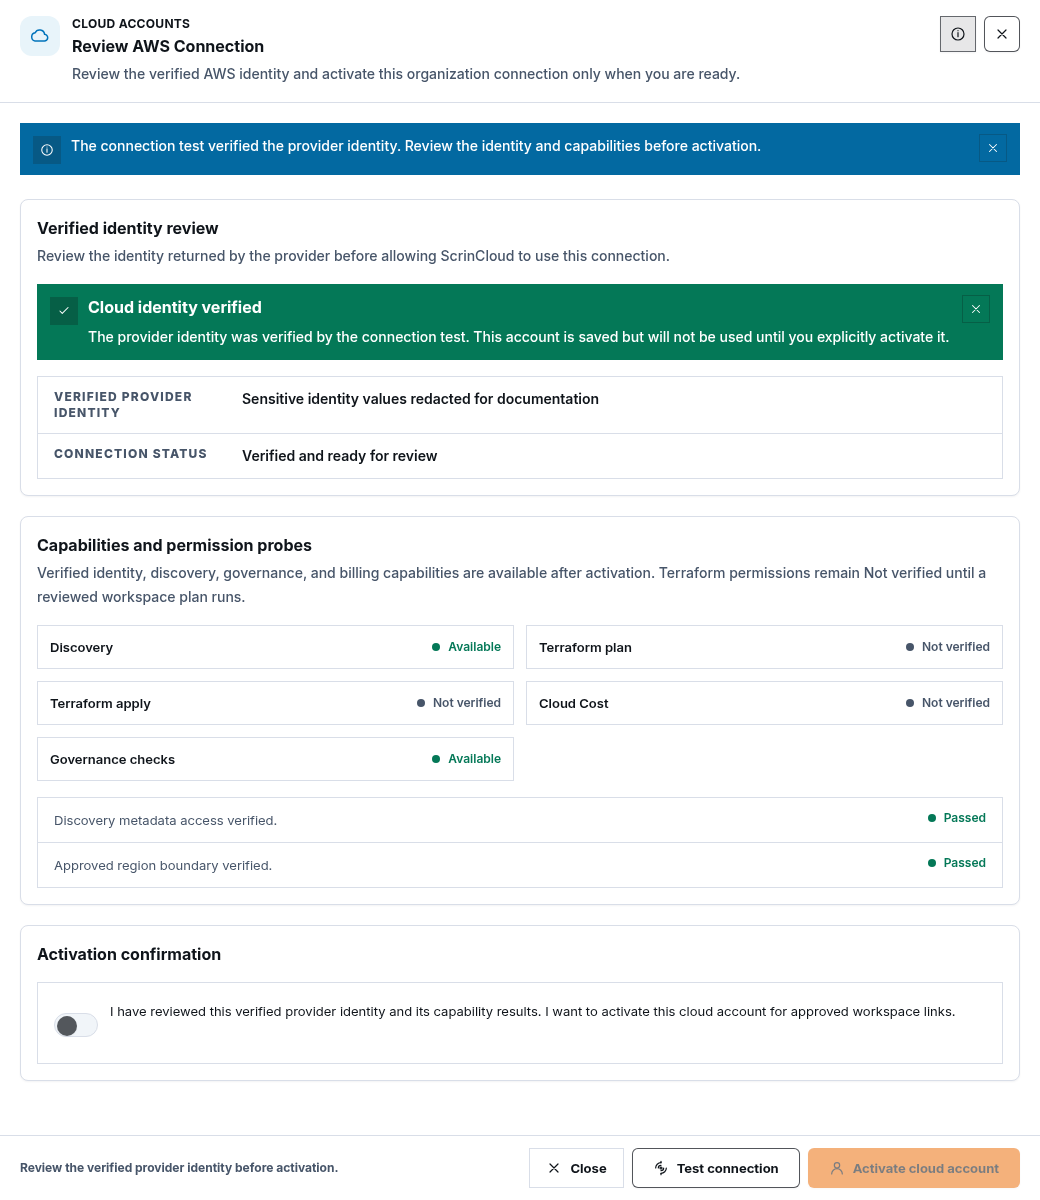
Section titled “Step 5: Test, verify, and activate”- choose Test connection;
- confirm the returned AWS identity is the intended role and account;
- review every capability and permission probe;
- resolve required failures in AWS and test again;
- select the identity acknowledgement; and
- choose Activate connection.
An active connection can be linked to eligible workspaces. It does not automatically apply Terraform or import every AWS resource.
Check your result
Section titled “Check your result”The connection should show the expected environment, permission level, regions, Verified identity, healthy required probes, and Active status.
Common blockers
Section titled “Common blockers”Access denied or identity not verified
Section titled “Access denied or identity not verified”Check the IAM role ARN, trust principal, current External ID condition, and the specific failed permission. Do not add broad administrator permissions.
External ID no longer matches
Section titled “External ID no longer matches”Use the value generated for the current setup. Do not reuse a value from a different organization, setup session, support note, or screenshot.
Discovery or cost remains unavailable
Section titled “Discovery or cost remains unavailable”Identity health and feature readiness are separate. Confirm the required region, service permission, billing access, and workspace link.