
Set up Cloud Discovery
Cloud Discovery reads approved provider metadata so your team can understand existing resources before deciding what belongs in a ScrinCloud design or management workflow.
Setup is complete only when the project provider, cloud account, allowed region, identity test, and workspace context agree.
- Typical time
- 15–30 minutes
- You need
- Cloud connection approval
- Next step
- Run read-only discovery
Understand the safety boundary
Section titled “Understand the safety boundary”Discovery:
- reads supported resource metadata in the selected scope;
- checks approved connectivity and permissions;
- records safe operational evidence; and
- can show supported resources and relationships for later review.
Discovery does not create, update, or delete cloud resources. It also does not automatically adopt every discovered resource into management.
Use an organization-owned cloud identity. Never paste long-lived access keys, user passwords, tokens, or credentials into a screenshot, documentation note, canvas property, or support message.
Before you begin
Section titled “Before you begin”Confirm that you have:
- the correct ScrinCloud project;
- the project’s provider, such as AWS or Azure;
- the intended environment and region;
- permission to view or manage cloud account connections;
- an approved provider identity with the required read access; and
- a workspace when discovery results should stay attached to workspace context.
For a first run, choose one approved region and a narrow scope.
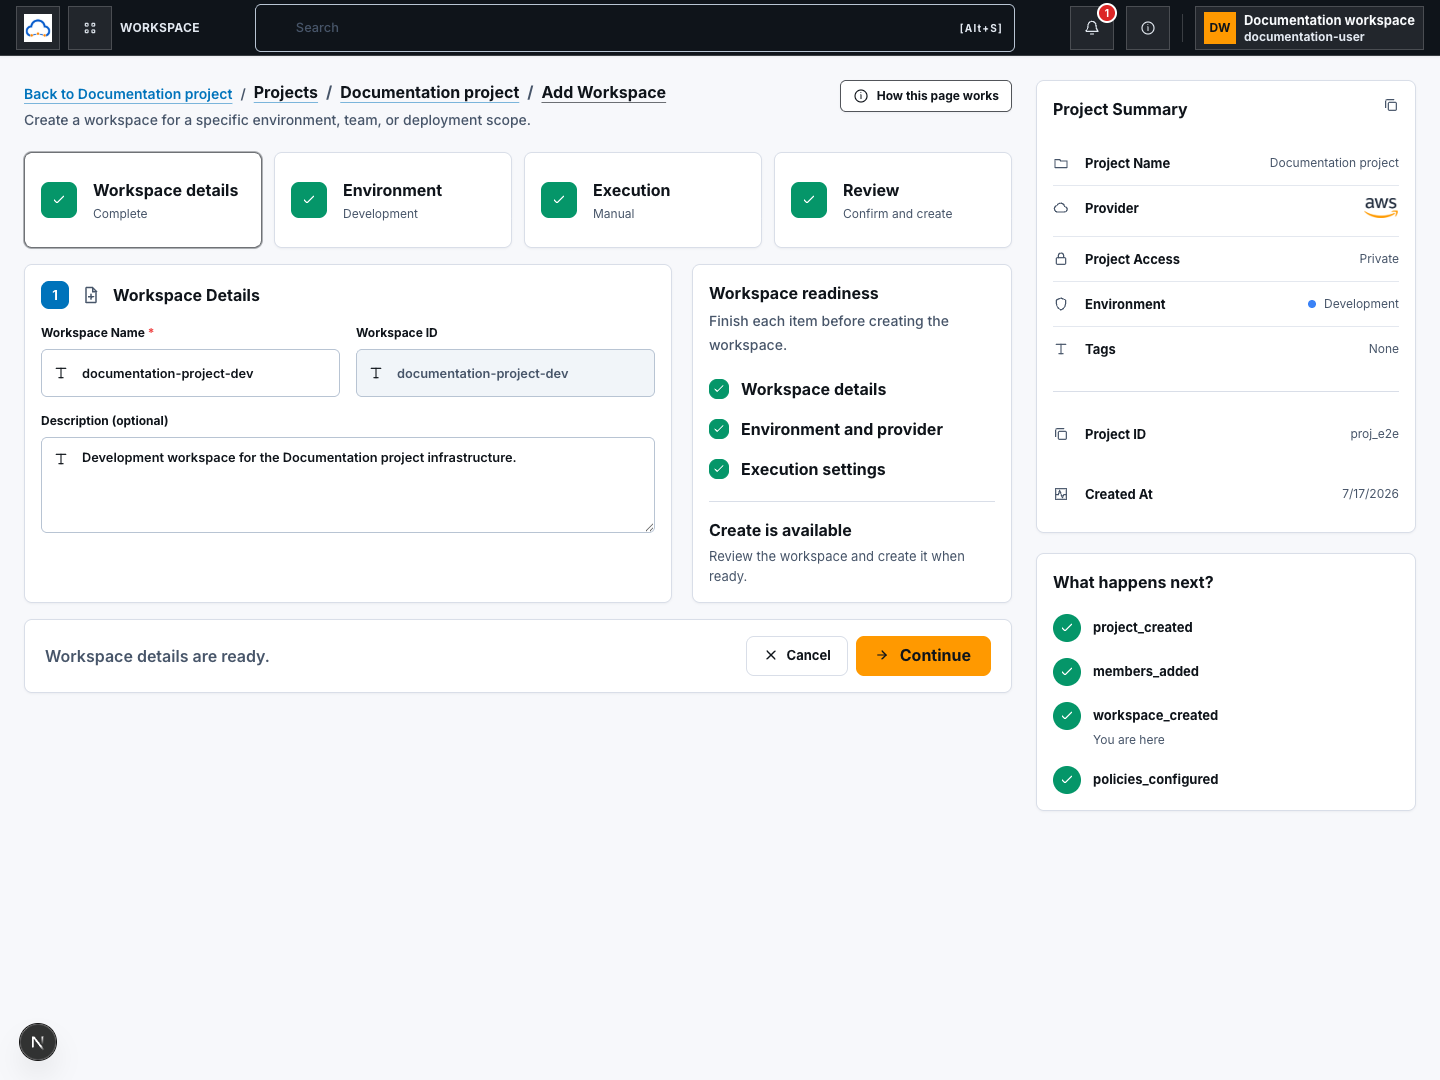
Step 1: Confirm the project discovery scope
Section titled “Step 1: Confirm the project discovery scope”- Open the intended project.
- Confirm the cloud provider.
- Confirm the project environment and default region.
- Open or select the intended workspace.
- Decide whether the run should be workspace-scoped or project-level.
- Write down the approved account or subscription and region without placing any secret values in the project description.
Provider accounts shown later are filtered by the project provider. An AWS project cannot use an Azure connection, and an Azure project cannot use an AWS connection.
Step 2: Open Cloud Accounts
Section titled “Step 2: Open Cloud Accounts”If no suitable connection exists:
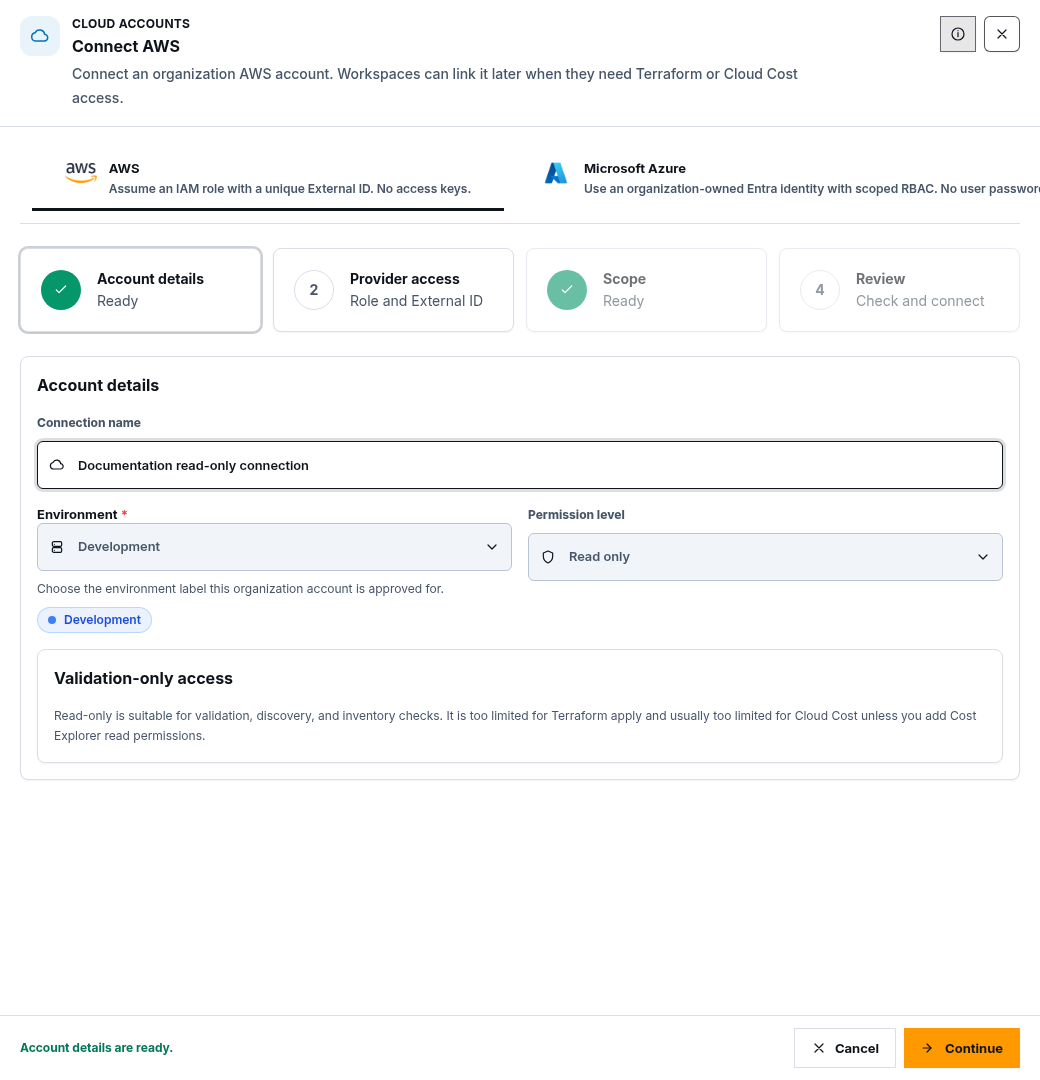
- Open Cloud Accounts from the dashboard.
- Choose the action to connect a cloud account.
- Select the same provider as the project.
- Enter a clear connection name that describes its approved purpose.
- Choose the minimum Permission level needed for the intended work.
Permission levels can include:
- Read only: metadata reads for discovery and review.
- Plan only: read and Terraform planning capability where approved.
- Plan + apply: broader delivery capability that should only be selected when the organization has approved it.
For discovery alone, prefer the lowest level that satisfies the provider permission checks.
Step 3: Configure the provider identity safely
Section titled “Step 3: Configure the provider identity safely”Follow the provider-specific setup shown in ScrinCloud.
Use the guided IAM role setup:
- Create or select an organization-owned IAM role.
- Use the unique External ID provided by the current setup session.
- Apply only the approved trust policy and read permissions.
- Return to ScrinCloud and provide the role information requested by the guided flow.
- Do not use AWS access keys for this connection.
Use an organization-owned Entra identity with scoped Azure RBAC:
- Choose the approved authentication method, such as Workload identity federation or Service principal.
- Confirm the intended tenant and subscription.
- Assign only the approved read roles and scopes.
- Complete the guided federation or service-principal fields.
- Never expose a client secret after it has been stored.
If your organization has a cloud platform or security team, have that team review the provider-side role before activation.

Step 4: Limit regions and review the connection
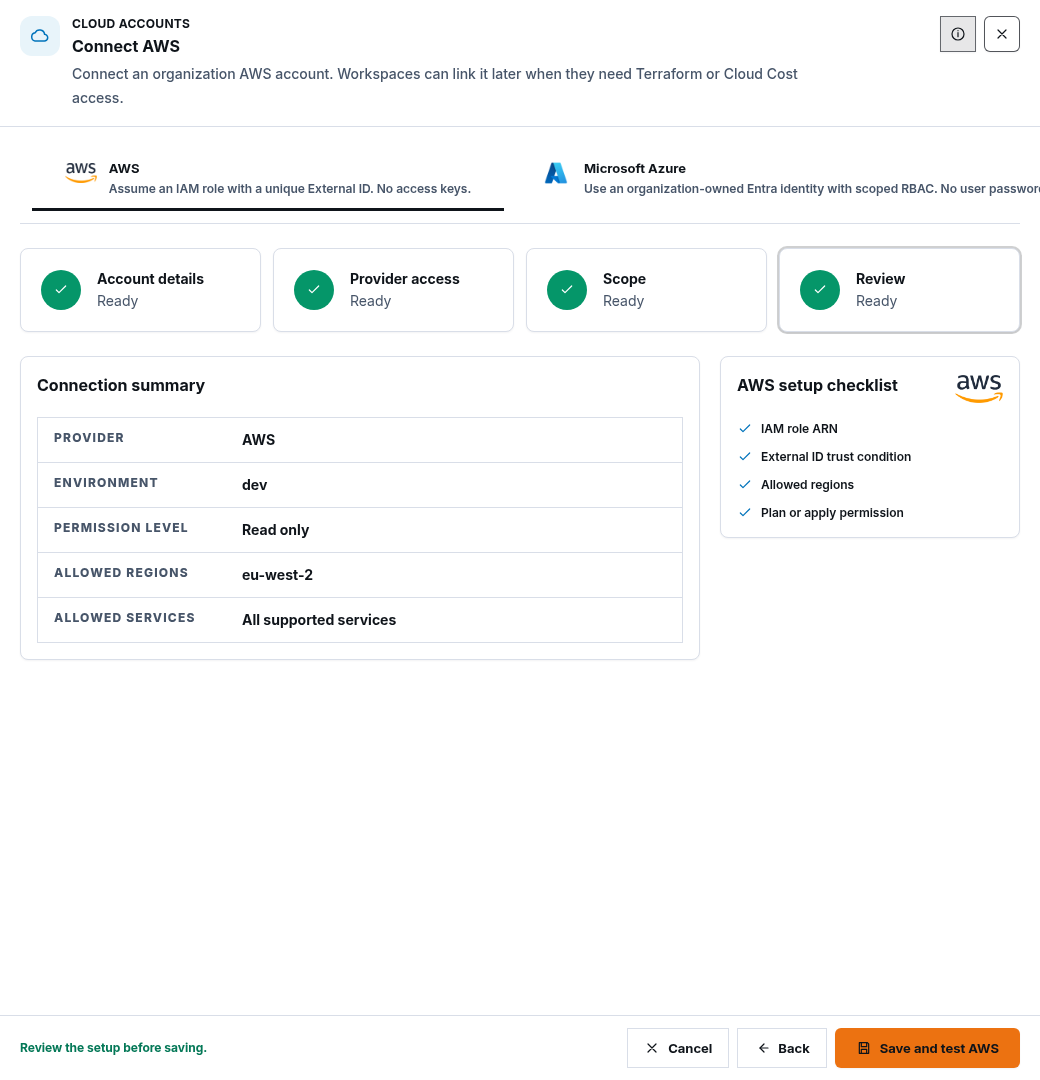
Section titled “Step 4: Limit regions and review the connection”- Select only the Allowed regions required for the approved discovery scope.
- Review the provider and connection name.
- Review the Permission level.
- Review the authentication method.
- Review the allowed regions.
- Confirm that the connection purpose and scope match the project.
- Save or continue to verification.
Do not add every region merely to avoid choosing one. A narrower list reduces accidental scope and makes discovery results easier to understand.
Step 5: Test and verify the connection
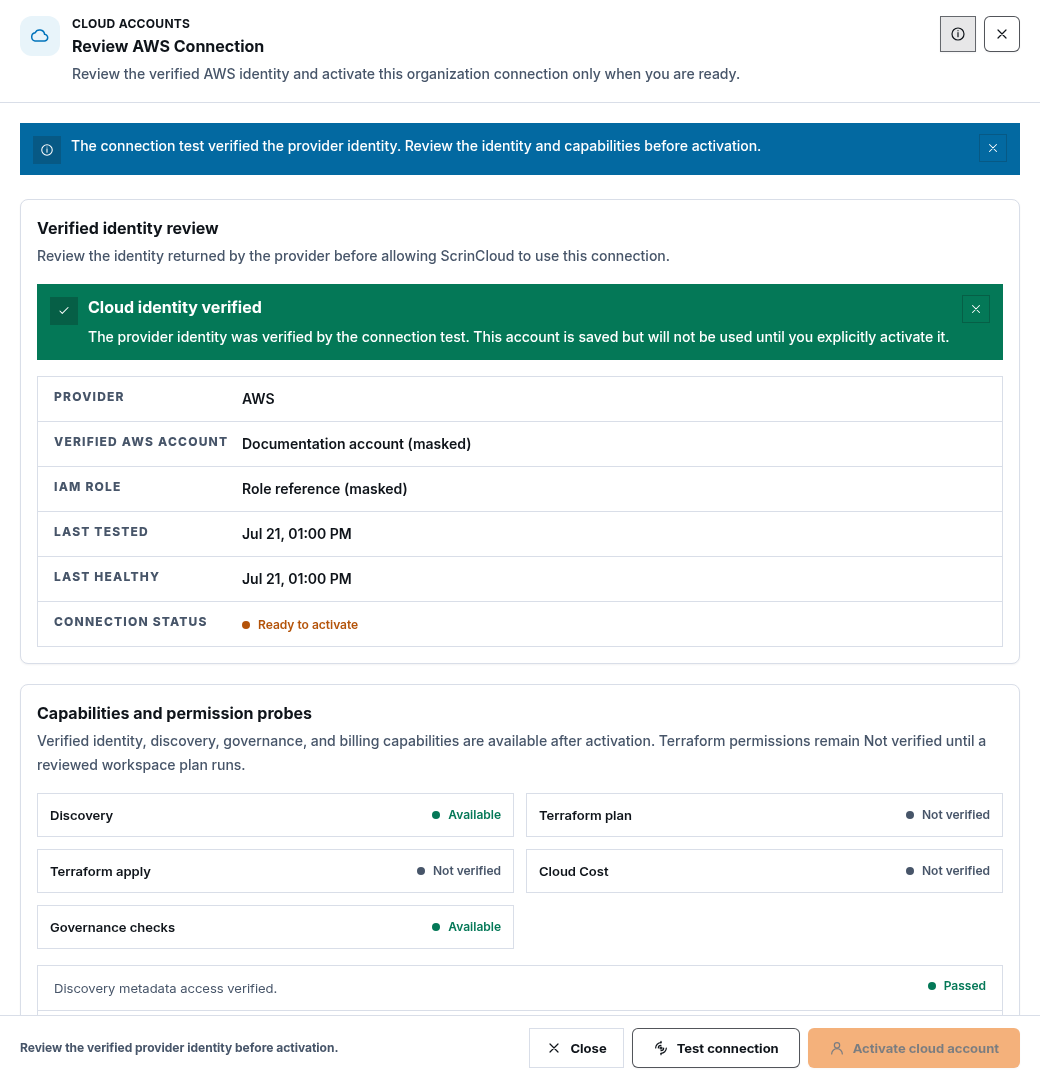
Section titled “Step 5: Test and verify the connection”- Choose Test connection or continue to the verification step.
- Wait while ScrinCloud checks provider identity and permission probes.
- Review Last tested and Last healthy.
- Confirm the connection health is Healthy.
- Review every permission probe result.
- Resolve failed required probes before activation.
- Activate or complete the connection only after the identity and requested capability are verified.
Warnings and failed permission probes should be read individually. Do not broaden the role without confirming which exact read action is necessary and approved.
Step 6: Confirm Discovery is ready
Section titled “Step 6: Confirm Discovery is ready”- Return to the project and open Architecture Studio.
- Open the Discovery area or choose the discovery action.
- If helpful, choose Quick intro to open Start Cloud Discovery.
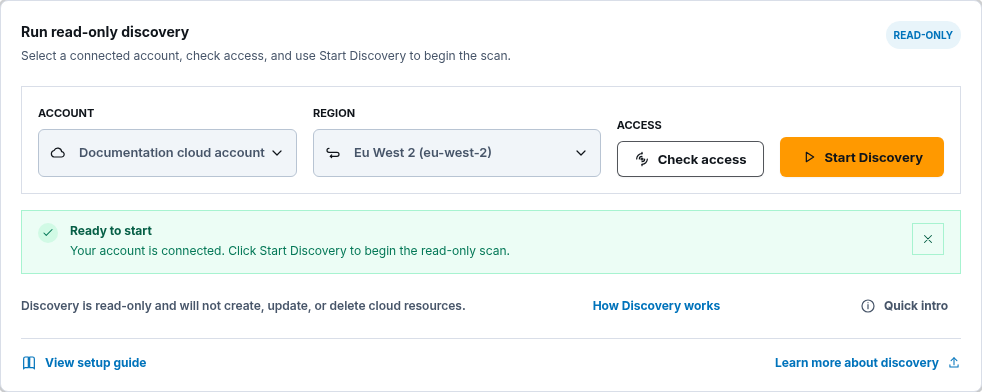
- Read the read-only explanation.
- In Run read-only discovery, choose the tested Account.
- Choose an allowed Region.
- Choose Check access.
- Wait for the success notice.
- Confirm Ready to start appears.
Stop before Start Discovery if the account, region, project, or workspace is not the one you intended.
Check your result
Section titled “Check your result”Cloud Discovery is ready when:
- the project and connection use the same provider;
- the intended region appears in Allowed regions;
- the permission level is no broader than approved;
- the connection identity and required permission probes are verified;
- connection health is Healthy;
- Check access succeeds in the discovery panel; and
- the panel shows Ready to start for the intended account and region.
Common blockers
Section titled “Common blockers”Connect a cloud account to start discovery
Section titled “Connect a cloud account to start discovery”No provider connection exists for this project. Open Cloud Accounts, create the provider connection, test it, and return to the project.
Cloud account access needs attention
Section titled “Cloud account access needs attention”The connection may be inactive, unhealthy, missing credentials required by its authentication method, or unavailable in the selected region. Open the account details and test it again.
The region is missing
Section titled “The region is missing”The connection’s Allowed regions do not include the selected project region. Confirm approval before editing the connection scope.
AWS role access is denied
Section titled “AWS role access is denied”Check the role trust policy, the current setup’s External ID, and approved role permissions. Do not reuse an expired setup value or add administrator access.
Azure verification fails
Section titled “Azure verification fails”Confirm the authentication method, organization-owned identity, tenant, subscription, and scoped RBAC. For a service principal, confirm the stored secret is configured without exposing it.
You do not have permission to manage connections
Section titled “You do not have permission to manage connections”Ask a project or organization administrator to create or verify the connection. Do not use a personal cloud identity as a workaround.
Continue
Section titled “Continue”With Ready to start visible, begin the safe scan and learn how to read its status and results.
Continue with Run and review Cloud Discovery.