
Create your first project
A project is the home for one product, platform area, or infrastructure initiative. It keeps the people, workspaces, diagrams, Terraform history, policy evidence, and cost context for that initiative together.
- Typical time
- 5–10 minutes
- You need
- Project creation access
- Next step
- Invite team members
Prepare the project details
Section titled “Prepare the project details”Before opening the form, write down:
- a short project name that teammates will recognize;
- one sentence describing the system or initiative;
- the primary cloud provider for the first workspace;
- the default environment;
- who should see the project; and
- a few useful tags such as a team, product, or cost-centre label.
Example:
| Field | Beginner-friendly example |
|---|---|
| Project Name | Customer Portal |
| Project ID | customer-portal |
| Description | Cloud infrastructure used by the customer portal team. |
| Provider | Amazon Web Services |
| Project Access | Private |
| Default Environment | Development |
| Tags | customer-experience, web-platform |
Do not put credentials, customer records, private account numbers, or incident details in the name, description, ID, or tags.
Open the project form
Section titled “Open the project form”- Sign in to the correct ScrinCloud organization.
- Open Projects from the product navigation.
- Choose Create project.
- Confirm that the four guided steps appear: Project details, Cloud provider, Access & defaults, and Review.
If Create project is missing, your role may not allow project creation. Ask an organization administrator to create the project or adjust your access.
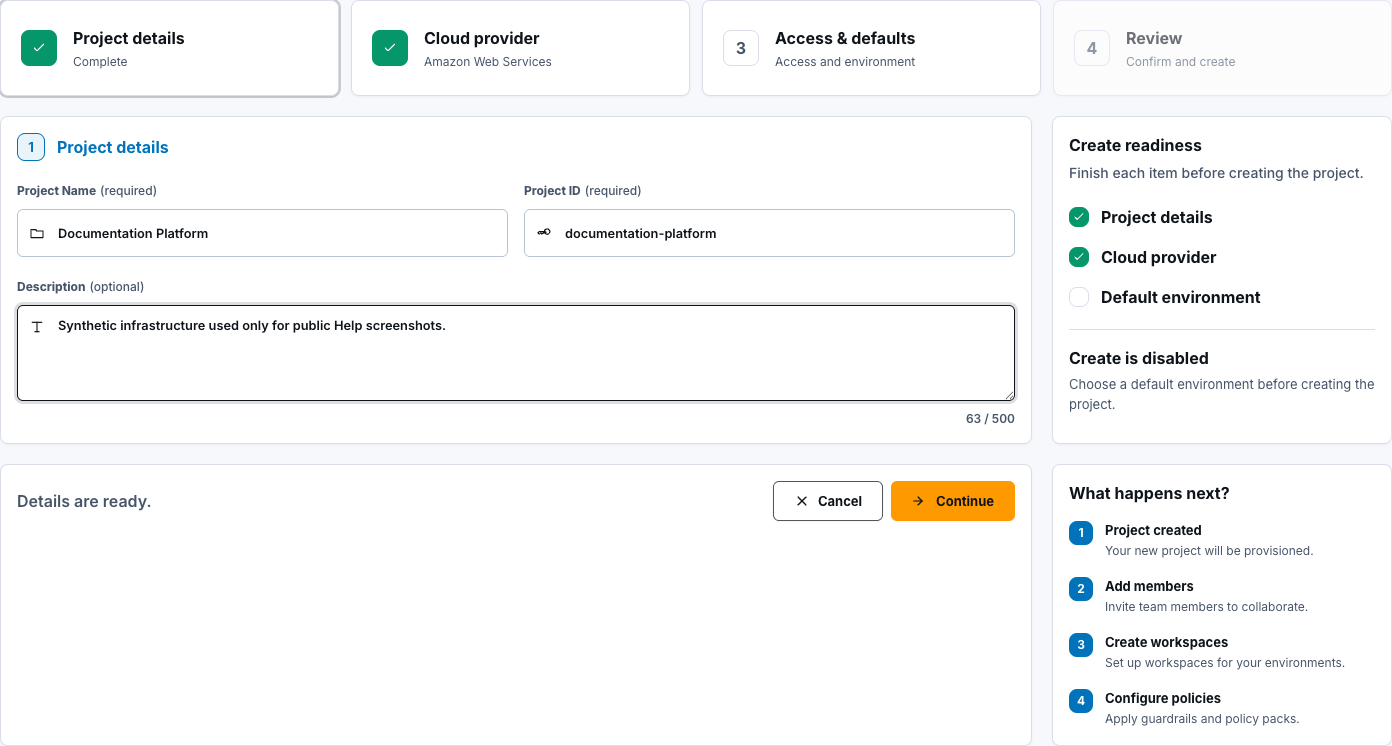
Step 1: Project details
Section titled “Step 1: Project details”- In Project Name, enter the human-readable name.
- Review the generated Project ID.
- Change the ID only when your naming standard requires it.
- Add a short Description that explains the project purpose.
- Check Create readiness. Project details should show as complete.
- Choose Continue.
The Project ID is a stable, URL-safe identifier. Use lowercase words separated by hyphens. Avoid environment names in the project ID because environments belong in workspaces.
Check your result
Section titled “Check your result”The first progress card should show the project name or indicate that the details are ready. Continue should be enabled.
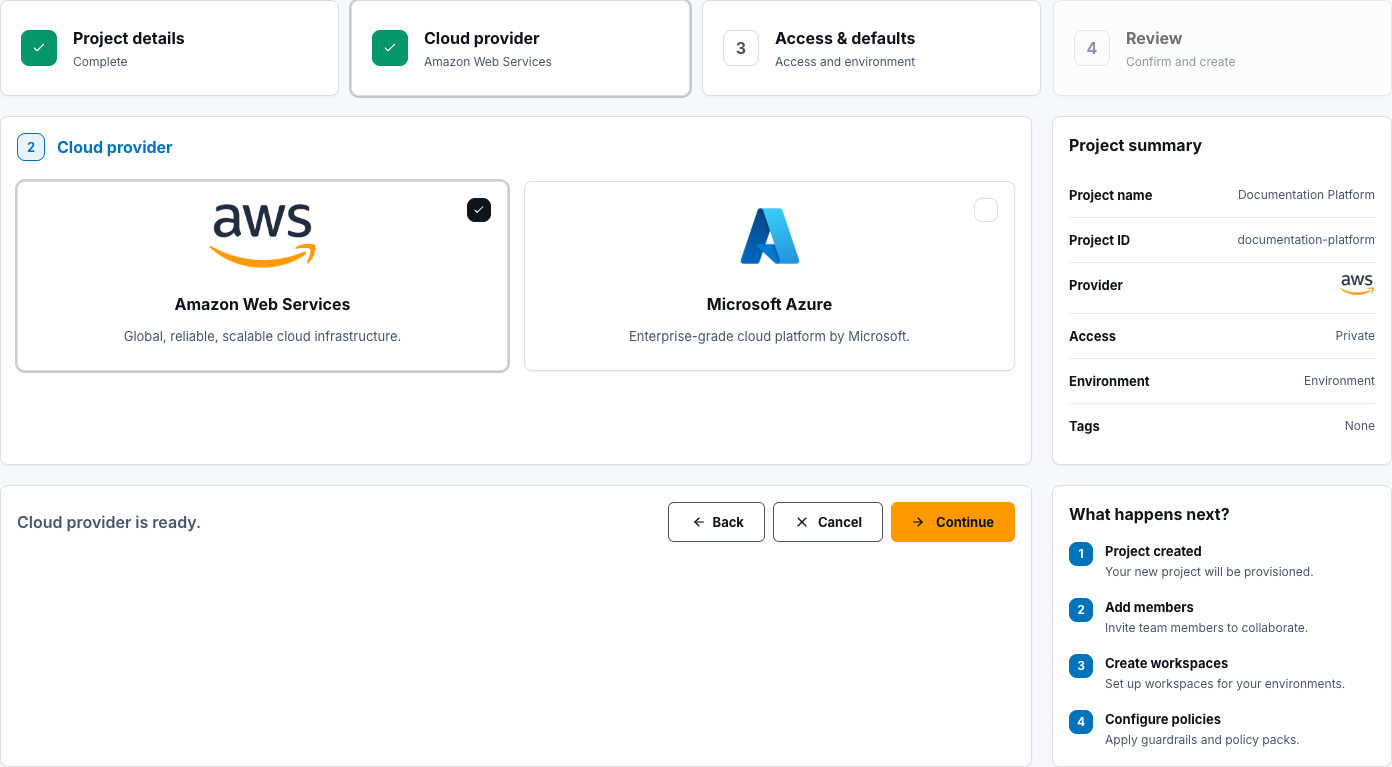
Step 2: Cloud provider
Section titled “Step 2: Cloud provider”- Select Amazon Web Services or Microsoft Azure.
- Choose the provider that owns most of the first workspace.
- Confirm the selected card is visibly marked.
- Choose Continue.
This choice sets the project default. A project can later contain controlled work across supported providers, but the first setup and resource library use the selected provider as their starting context.
Selecting a provider does not connect an account and does not grant ScrinCloud cloud access.
Check your result
Section titled “Check your result”The provider appears in Project summary, and the Cloud provider progress card is complete.
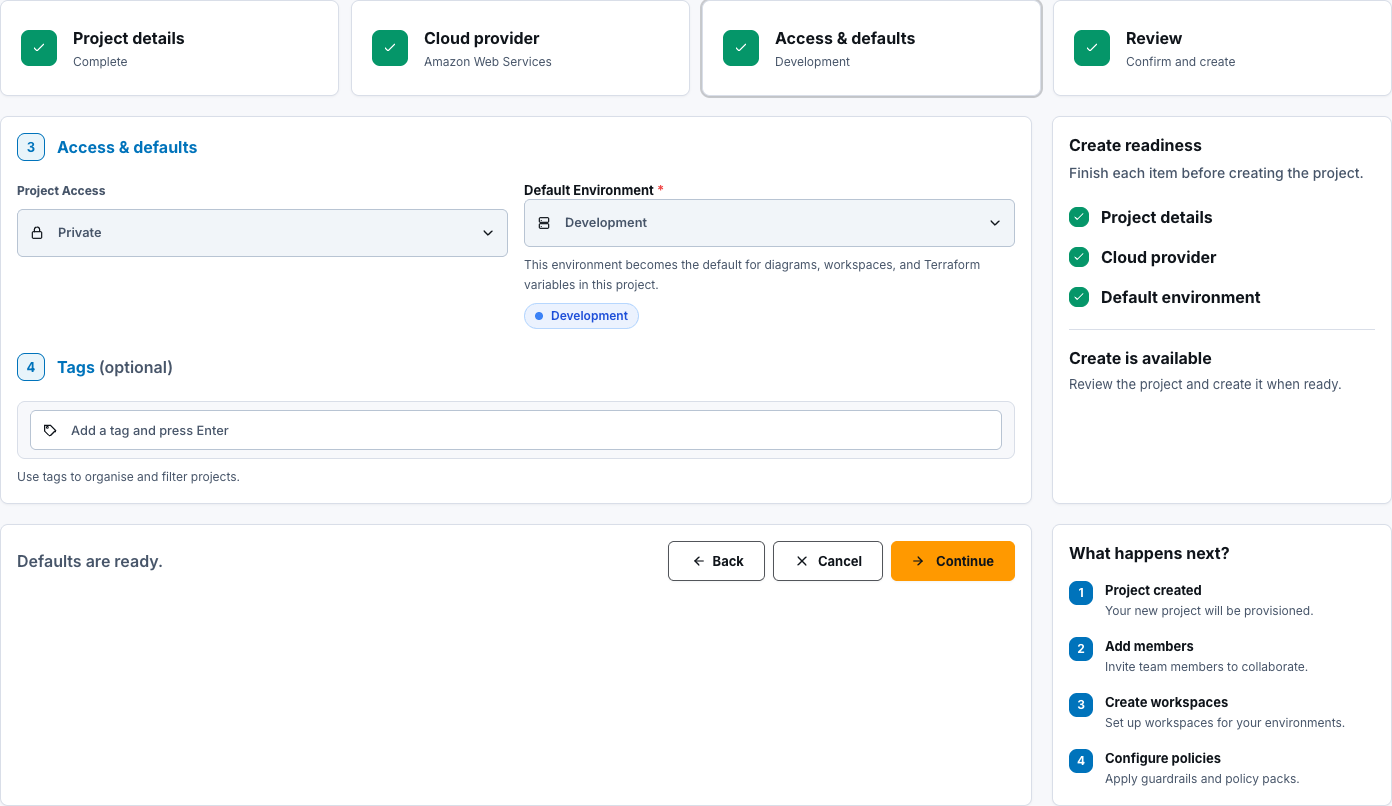
Step 3: Access & defaults
Section titled “Step 3: Access & defaults”- Open Project Access.
- Choose the narrowest suitable option:
- Private limits access to explicitly authorized people.
- Team is suitable when the project should be available to its assigned team.
- Organization is suitable only when broad organization visibility is intended.
- Choose the Default Environment used by the first diagrams, workspaces, and Terraform variables.
- Add optional tags. Press Enter after each tag.
- Confirm Default environment is complete in Create readiness.
- Choose Continue.
Start with a non-production environment when you are learning the workflow. Your organization may offer different environment names; select the one that matches its approved terminology.
Check your result
Section titled “Check your result”Create readiness should say Create is available. If it says Create is disabled, read the reason shown directly below it and return to the named step.
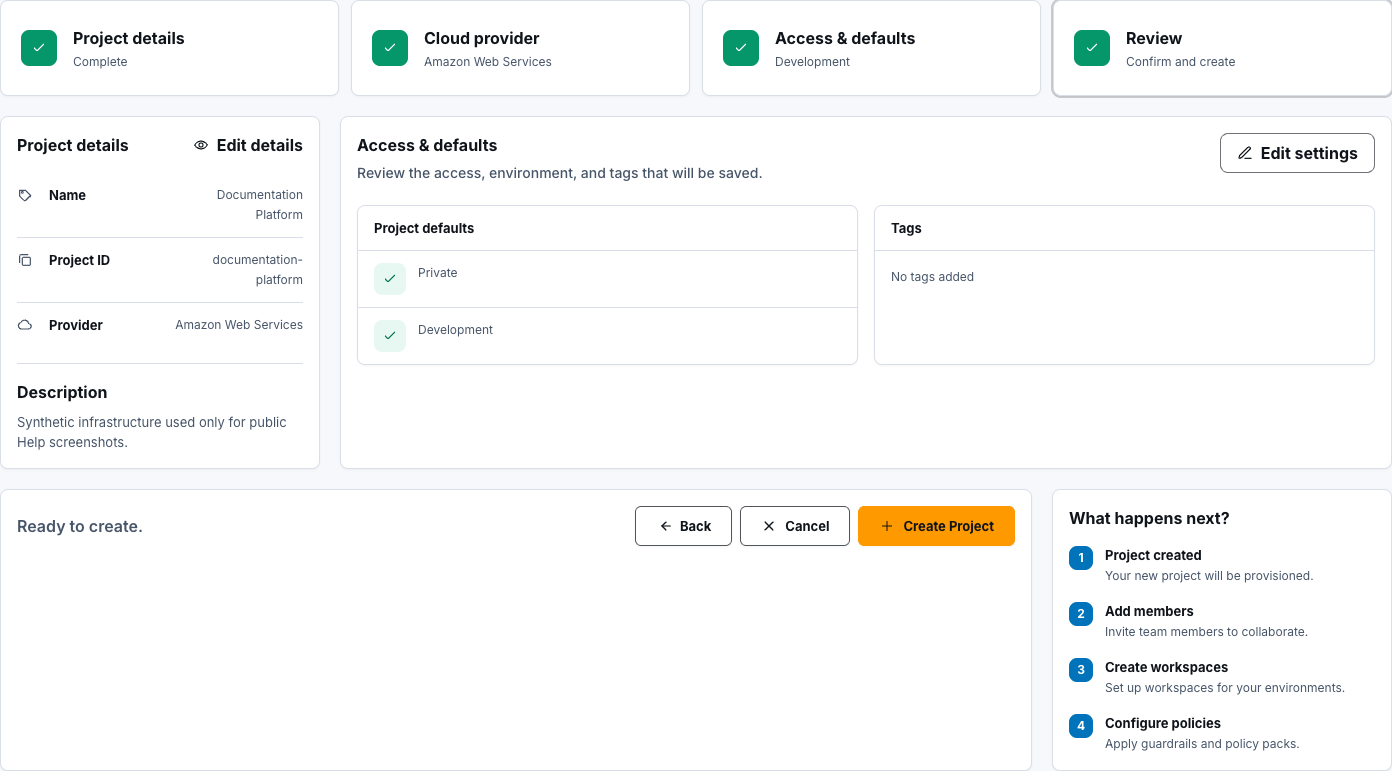
Step 4: Review and create
Section titled “Step 4: Review and create”- Read the project name, ID, description, provider, access, environment, and tags.
- Use the edit actions if any value is wrong.
- Confirm the project does not contain sensitive information.
- Choose Create project.
- Wait while ScrinCloud creates and opens the guided project setup.
Do not click the button more than once. The loading state prevents duplicate submissions while the project is being created.
Confirm the project was created
Section titled “Confirm the project was created”Creation succeeded when:
- the new project name appears in the setup page;
- Project Created is marked complete;
- the setup sequence shows Add Members, Create Workspaces, and Configure Policies; and
- no error notification is displayed.
If the project does not open, return to Projects and look for its name. Do not create a duplicate until you confirm that the first request failed.
Common blockers
Section titled “Common blockers”The project ID is rejected
Section titled “The project ID is rejected”Use letters and numbers separated by hyphens. Remove spaces, punctuation, and leading or trailing hyphens. The ID must also be unique within its scope.
The environment list is empty
Section titled “The environment list is empty”Your organization may not have an available environment configuration. Ask an administrator to confirm the environment catalogue.
Create project remains disabled
Section titled “Create project remains disabled”Open each progress card in order. Required data is:
- Project Name and a valid Project ID;
- one cloud provider; and
- one Default Environment.
You selected the wrong provider
Section titled “You selected the wrong provider”Return to Cloud provider before creation. After creation, do not hide a provider mismatch by using an unrelated workspace; correct the project through the approved project settings flow.
Continue
Section titled “Continue”The product now opens the project setup journey. Continue with Invite your team.