
Invite your team
Project access determines who can see, change, review, and administer the work you create. Invite people according to responsibility, not convenience.
- Typical time
- 5–10 minutes
- You need
- Approved email addresses
- Next step
- Create a workspace
Before you invite anyone
Section titled “Before you invite anyone”Confirm:
- the recipient is allowed to access this project;
- the email address is correct;
- the person’s responsibility is understood;
- any optional permission is genuinely required; and
- the invitation message contains no sensitive information.
If you are setting up a personal evaluation, you can choose Skip for now and invite people later. Skipping marks this setup task as intentionally deferred; it does not make the project public.
Choose the right role
Section titled “Choose the right role”ScrinCloud offers four project roles:
| Role | Use it when the person needs to |
|---|---|
| Admin | Manage the full project, including sensitive settings and access. Assign sparingly. |
| Editor | Create and modify project resources and settings. |
| Reviewer | Review plans and suggest changes without general editing authority. |
| Viewer | Read project data without changing it. |
Start with the lowest role that supports the person’s work. Access can be changed later through the approved team-management flow.
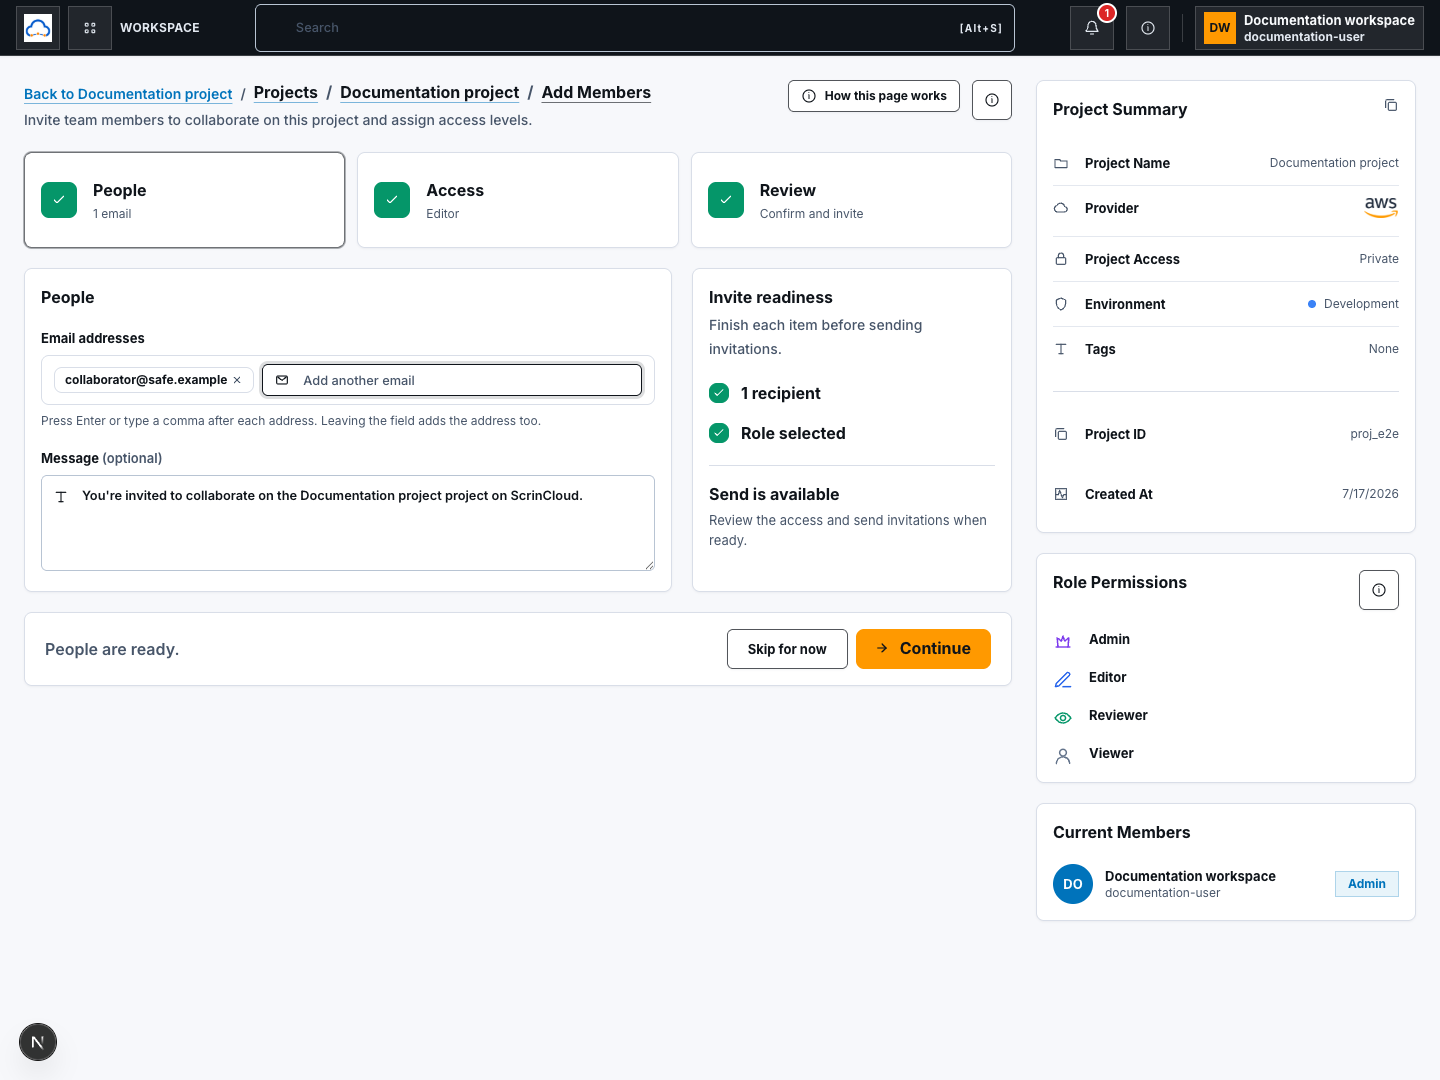
Step 1: Add people
Section titled “Step 1: Add people”- In the project setup sequence, open Add Members.
- Confirm the guided steps are People, Access, and Review.
- Enter an email address in Email addresses.
- Press Enter, comma, or move focus away from the field to add it.
- Repeat for other people who should receive the same role and permissions.
- Review the default Message and edit it if needed.
- Check Invite readiness. At least one recipient should be ready.
- Choose Continue.
Use a separate invitation group when recipients need different roles. Do not give several people Admin access simply to save time.
Check your result
Section titled “Check your result”The People progress card shows the number of email addresses. Continue becomes available after at least one valid recipient is added.
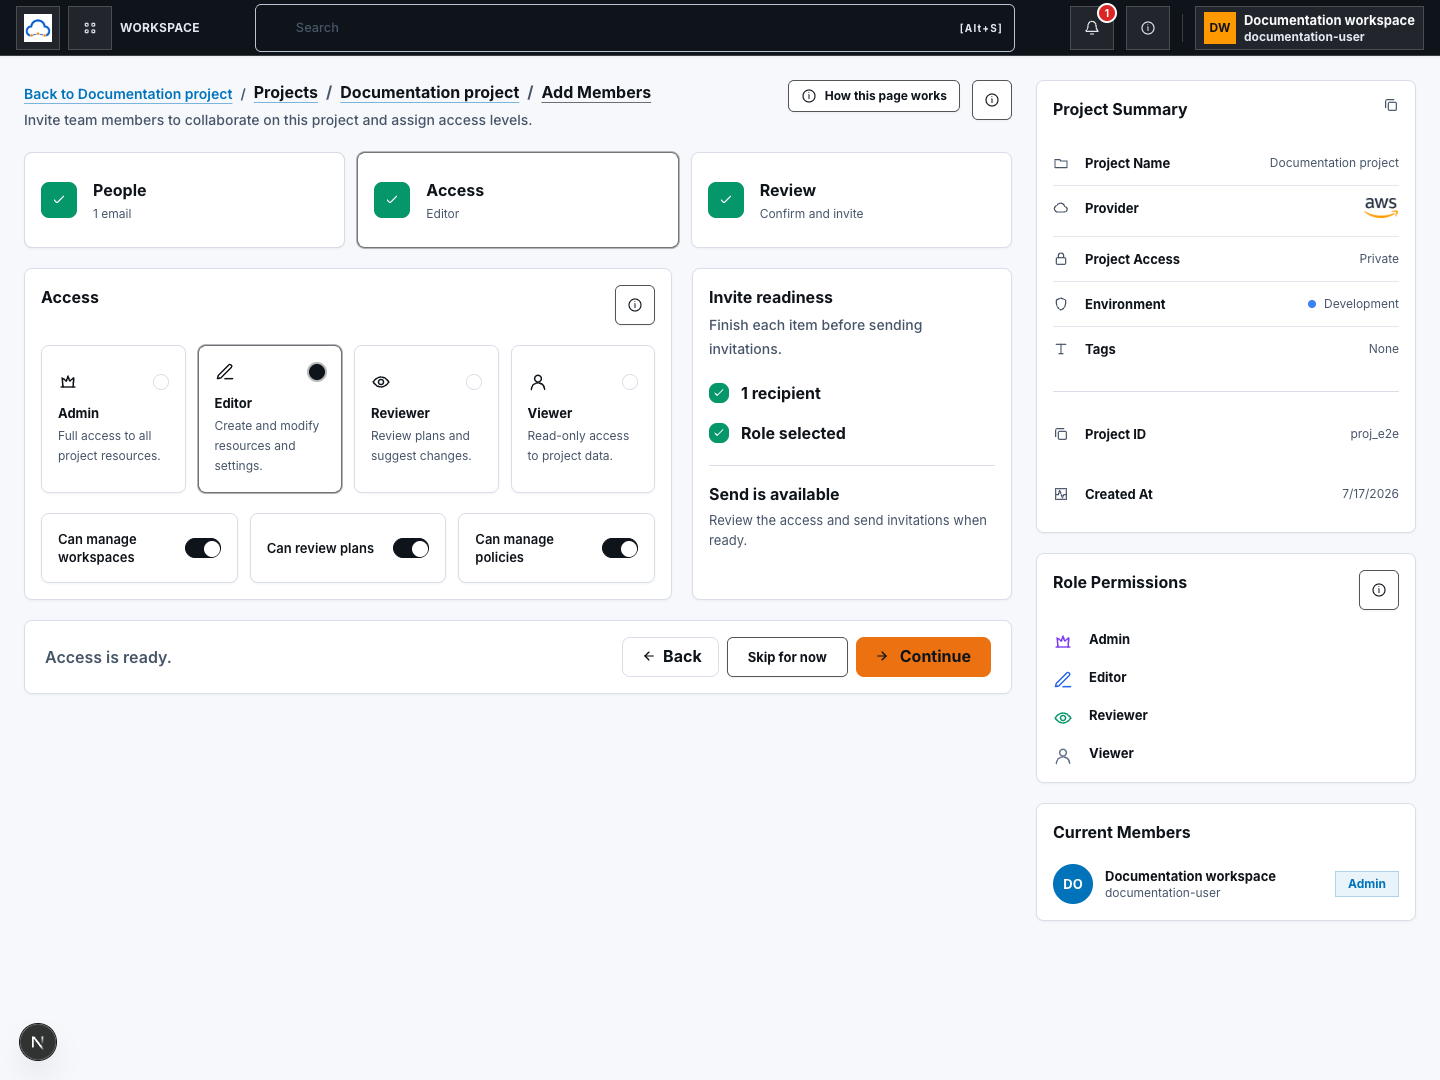
Step 2: Choose access
Section titled “Step 2: Choose access”- Select Admin, Editor, Reviewer, or Viewer.
- Read the role description before continuing.
- Review the optional permission switches:
- Can manage workspaces
- Can review plans
- Can manage policies
- Disable permissions the person does not need.
- Remember that Viewer is read-only, so its optional permissions remain disabled.
- Check Invite readiness for the selected role.
- Choose Continue.
Role and optional permissions work together. A title alone should not be used to infer access; review the switches that will be included in the invitation.
Check your result
Section titled “Check your result”The Access progress card shows the selected role, and Invite readiness reports that the role is selected.
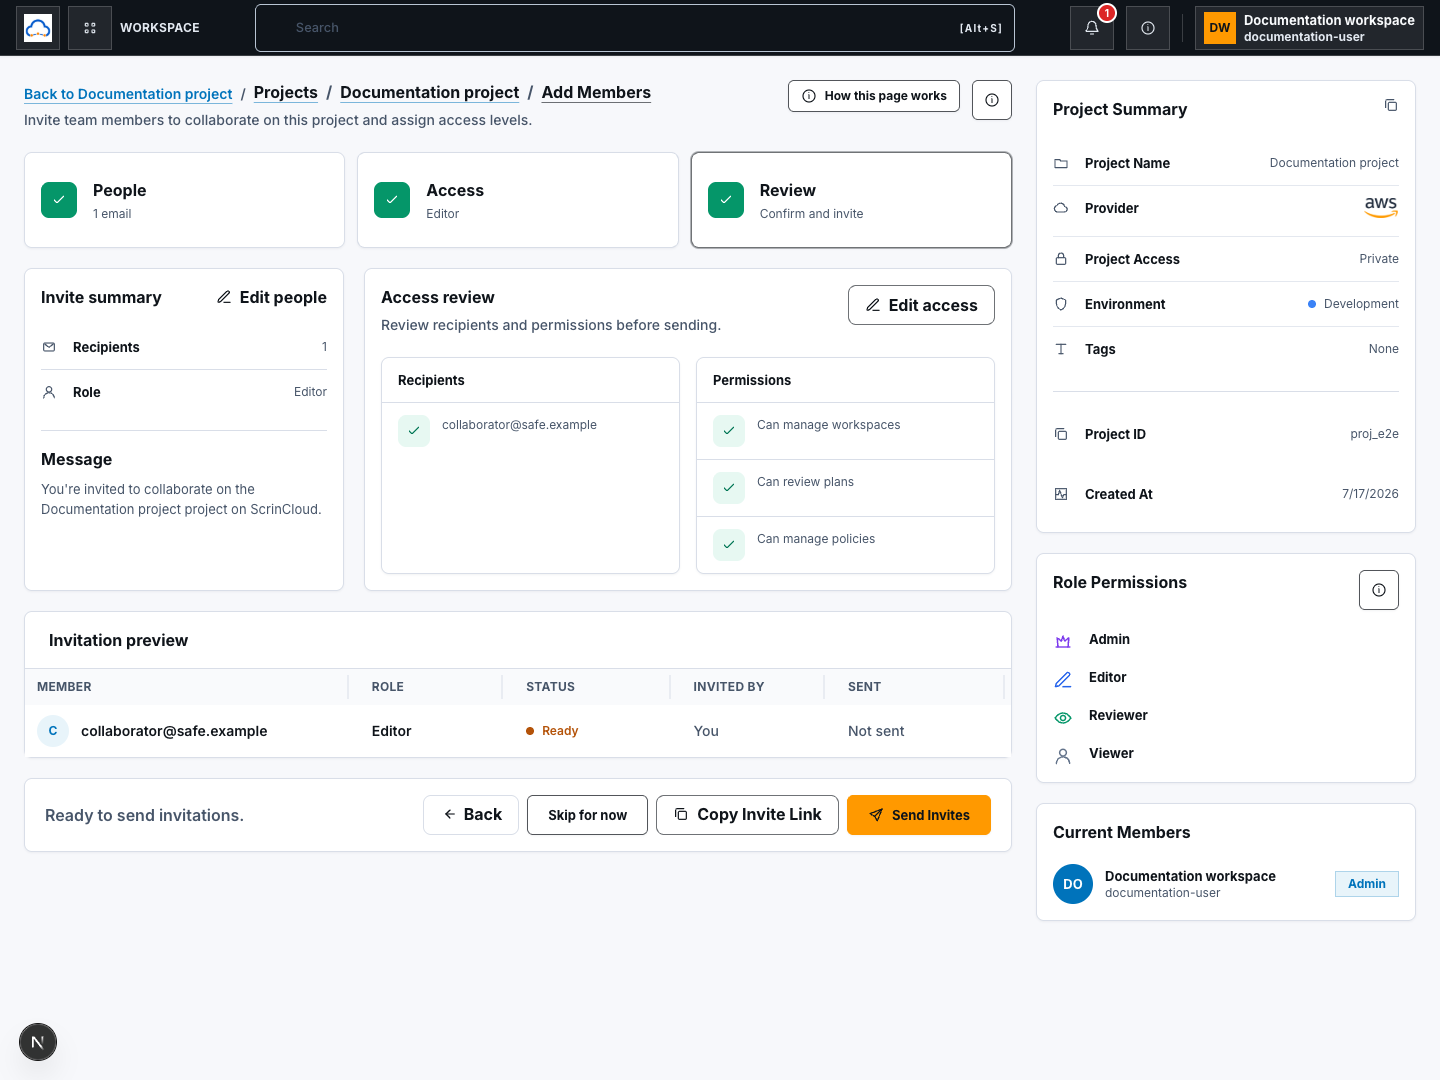
Step 3: Review and invite
Section titled “Step 3: Review and invite”- Read Invite summary and confirm the number of recipients and the role.
- Read Access review and verify every optional permission.
- Check Invitation preview for recipient, role, and status.
- Choose one delivery method:
- Send Invites sends the invitations through the configured email service.
- Copy Invite Link creates one secure link when exactly one recipient is present.
- If copying a link, read the confirmation and choose Copy invite link.
- Share a copied link only with the intended recipient through an approved private channel.
Never paste invite links into public chat, tickets, documentation, screenshots, or source control. Treat a live invitation link as access material.
Confirm invitations were created
Section titled “Confirm invitations were created”The step succeeded when:
- the invitation preview shows Sent, Pending, or another expected status;
- no error notification is present;
- the setup progress marks Add Members complete; and
- the next setup step opens.
An email delivery failure does not mean the recipient received access. Read the error, confirm the organization’s email service, and retry through the approved path.
Skip safely
Section titled “Skip safely”Choose Skip for now when no teammate should be invited yet. You can return to project team management later.
Do not use Skip to avoid deciding who should own review or approval. Before production delivery, the project must have appropriate contributors and reviewers.
Common blockers
Section titled “Common blockers”Continue is disabled
Section titled “Continue is disabled”Add at least one valid email address. A value still sitting in the input may need Enter, comma, or a click outside the field before it becomes a recipient.
Copy Invite Link is disabled
Section titled “Copy Invite Link is disabled”The secure link action supports exactly one recipient at a time. Remove extra addresses or use Send Invites.
Permission switches are disabled
Section titled “Permission switches are disabled”Viewer is intentionally read-only. Choose a different role only if the person’s responsibility requires it.
The invitation email failed
Section titled “The invitation email failed”Check the displayed error and ask an administrator to confirm email delivery configuration. Do not assume the person can sign in until the invitation has a successful or pending state.
Continue
Section titled “Continue”Next, create the environment and delivery boundary that the canvas and code editor will use. Continue with Set up a workspace.