
Design in Architecture Studio
Architecture Studio is ScrinCloud’s visual design workspace. It gives your team one place to arrange cloud resources, describe their relationships, configure important properties, and preserve a reviewable architecture revision.
This guide goes beyond the first small canvas exercise. It explains how to work confidently in an existing project, keep the diagram readable, and prepare a saved design for validation and Terraform review.
- Typical time
- 20–30 minutes
- You need
- Edit access to a project
- Next step
- Validate the design
Before you begin
Section titled “Before you begin”You should have:
- a ScrinCloud project for the intended provider and environment;
- a workspace linked to that project;
- Editor or Admin access when you need to change the design; and
- a clear, small design goal, such as “show the application network and its database.”
If you are new to the product, complete Build your first architecture first.
Step 1: Open the correct project and workspace
Section titled “Step 1: Open the correct project and workspace”- Open Projects from the ScrinCloud navigation.
- Select the project that owns this architecture.
- Choose the intended workspace.
- Open Architecture Studio.
- In the header, confirm the project or architecture name, cloud provider, environment, region, and workspace.
- Check that the page is not marked Read only.
Use Switch workspace before editing if the header shows the wrong workspace. A diagram and its Terraform workspace must stay aligned.
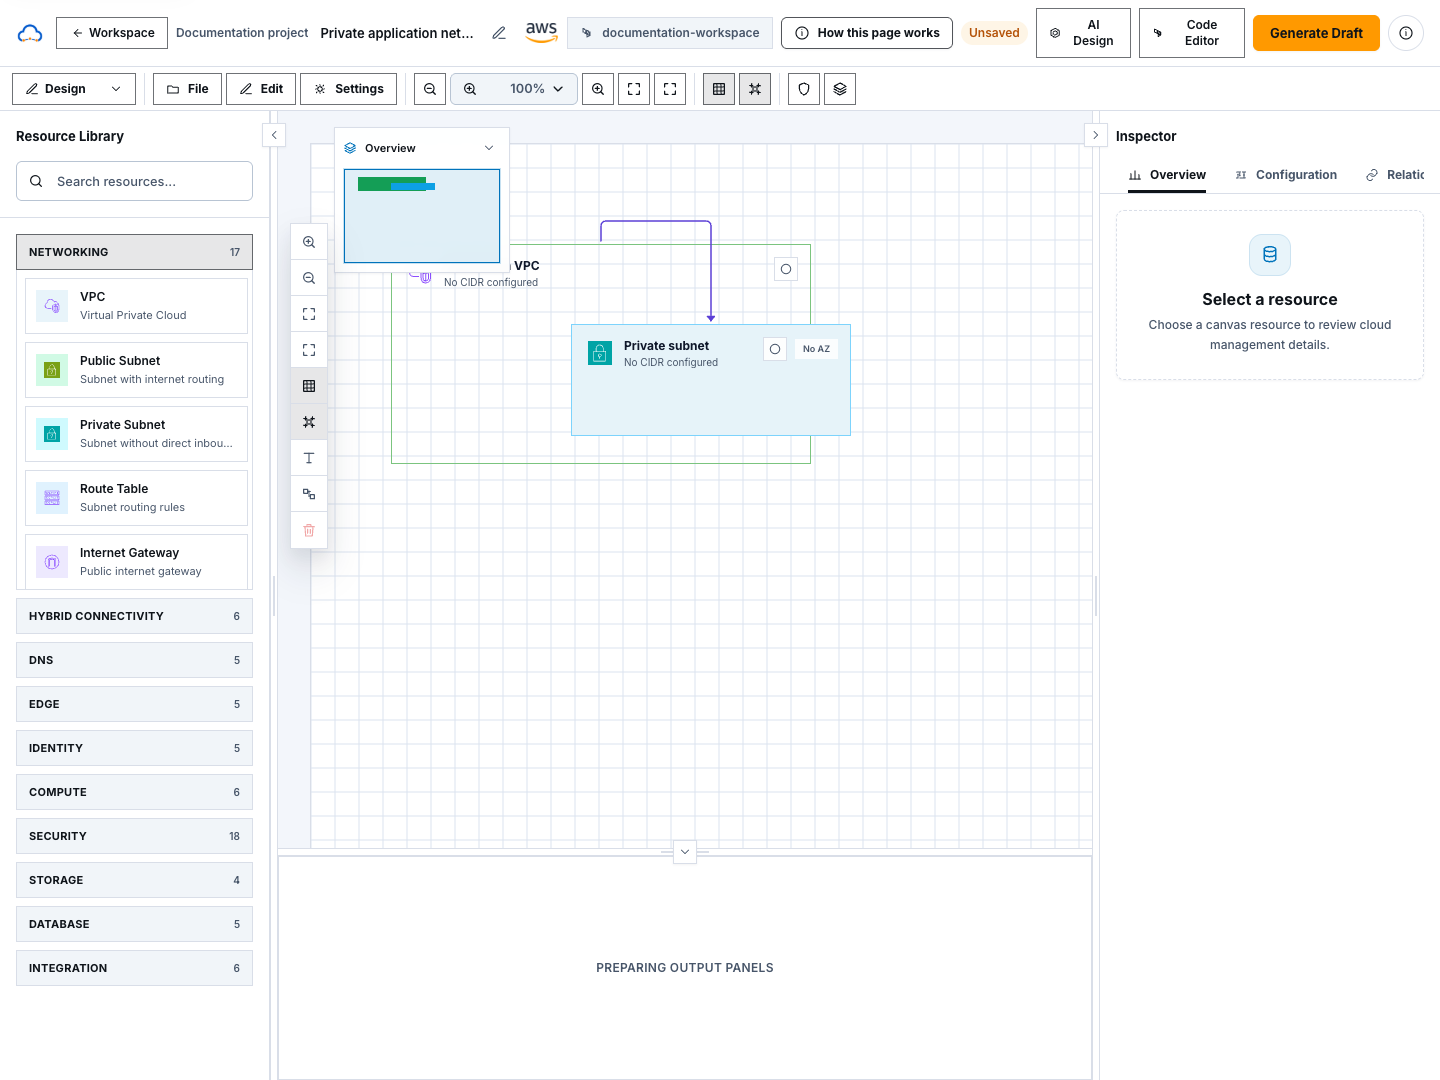
Step 2: Understand the workspace
Section titled “Step 2: Understand the workspace”Architecture Studio has five main areas:
- Resource library: browse or search provider resources you can place.
- Canvas: arrange resources and show their supported relationships.
- Inspector: edit the selected resource and open design workflows.
- Toolbar: zoom, fit, organize, select, and run design checks.
- Header and File menu: manage diagram context, save state, revisions, imports, exports, and the Code Editor handoff.
The header save state is important:
- Saved means the displayed design is stored as the current revision.
- A saving or changed state means the canvas has work that may not yet be included in later evidence.
- Save failed means you should stop and resolve the error before relying on validation or generated code.
Step 3: Create or open the intended diagram
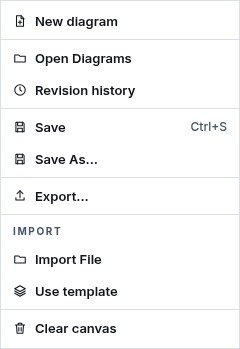
Section titled “Step 3: Create or open the intended diagram”Open the File menu and choose the action that matches your work:
- New diagram starts a blank design in the current project.
- Open Diagrams switches to another saved project diagram.
- Save stores the current diagram.
- Save As… creates a separate copy with a new name.
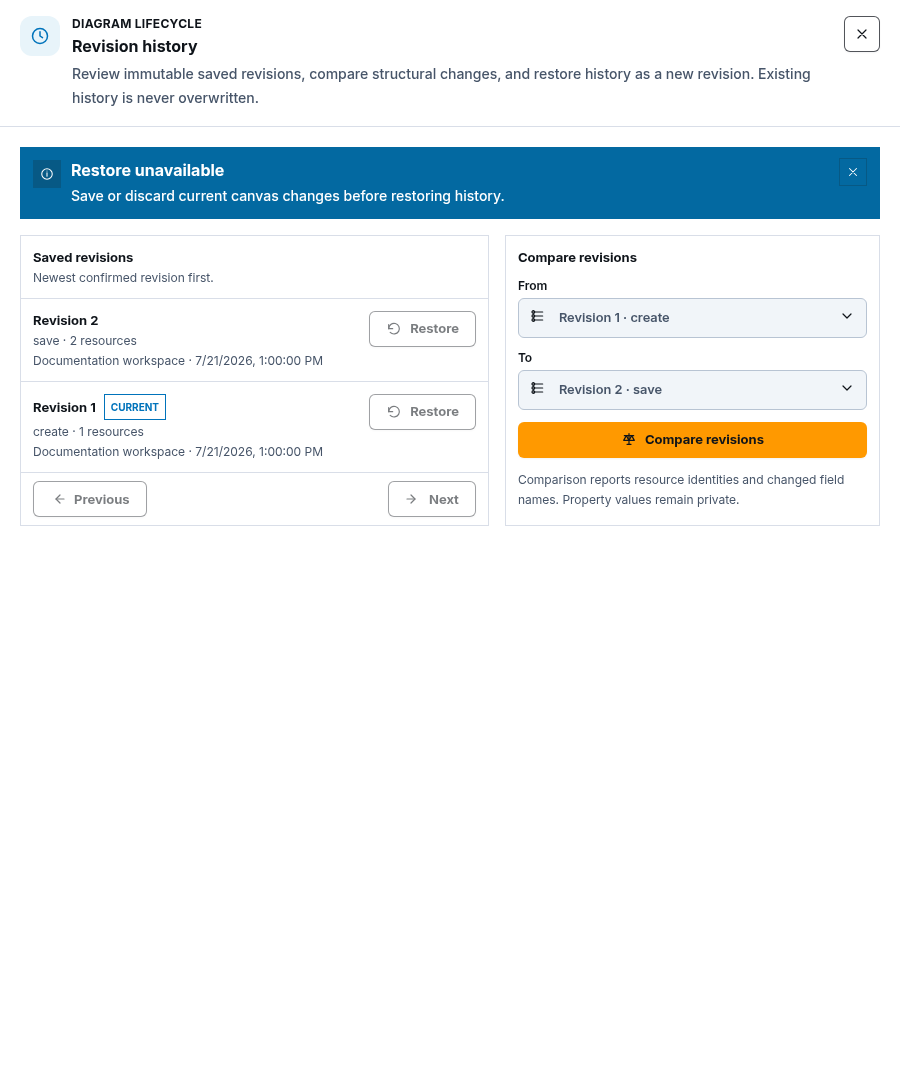
- Revision history shows saved versions and their lineage.
- Export… prepares a portable copy for an approved sharing workflow.
- Import File previews a portable ScrinCloud diagram before anything is added.
- Use template opens the provider-aware template library.
- Clear canvas removes the current local resources and connections after confirmation; the cleared state is not persisted until Save succeeds.
For a new diagram:
- Choose New diagram.
- Enter a clear name that describes the system and environment.
- Confirm the provider, environment, and region.
- Create the diagram.
- Wait until the new name and context appear in the header.
For an existing diagram, choose Open Diagrams, verify the name and last saved context, and only then begin editing.
Step 4: Add and configure resources
Section titled “Step 4: Add and configure resources”Start with the smallest set of resources that explains the design.
- Use Search resources… in the resource library.
- Select the correct provider category.
- Drag a resource onto the canvas.
- Select the resource to open its properties in the Inspector.
- Give it a clear display name.
- Complete required fields before optional fields.
- Repeat for each resource the design genuinely needs.
For documentation and training, use synthetic names and private example
networks such as 10.40.0.0/16. In real projects, follow your organization’s
approved naming, region, tagging, and address standards.
Never enter passwords, credentials, access tokens, private keys, or secrets in canvas properties.
Step 5: Model real relationships
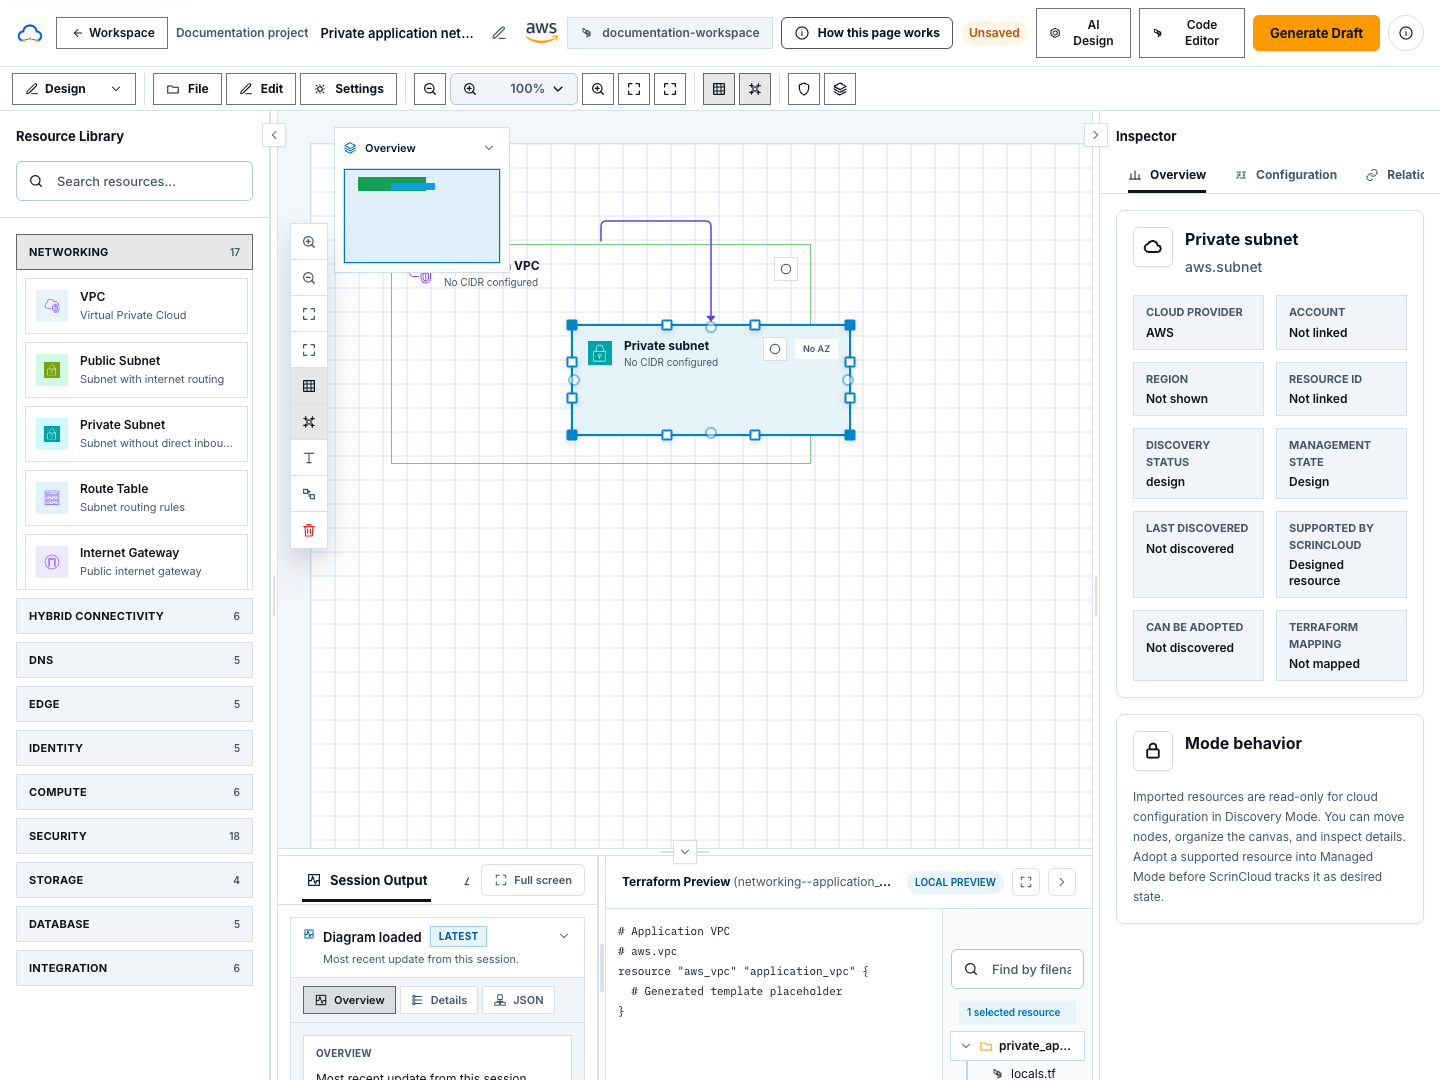
Section titled “Step 5: Model real relationships”A canvas connection should represent a real relationship supported by the product model.
- Place the related resources near one another.
- Hover over or select the source resource to reveal connection handles.
- Drag from the appropriate handle to the target resource.
- Release when the intended target highlights.
- Select the connection and review any relationship information.
- Delete and recreate the connection if its direction or meaning is wrong.
Examples include a subnet inside a network boundary, an application using a database, or a load balancer routing to an approved target.
Do not add decorative lines. Connections become part of validation and Terraform context.
Step 6: Organize the canvas for review
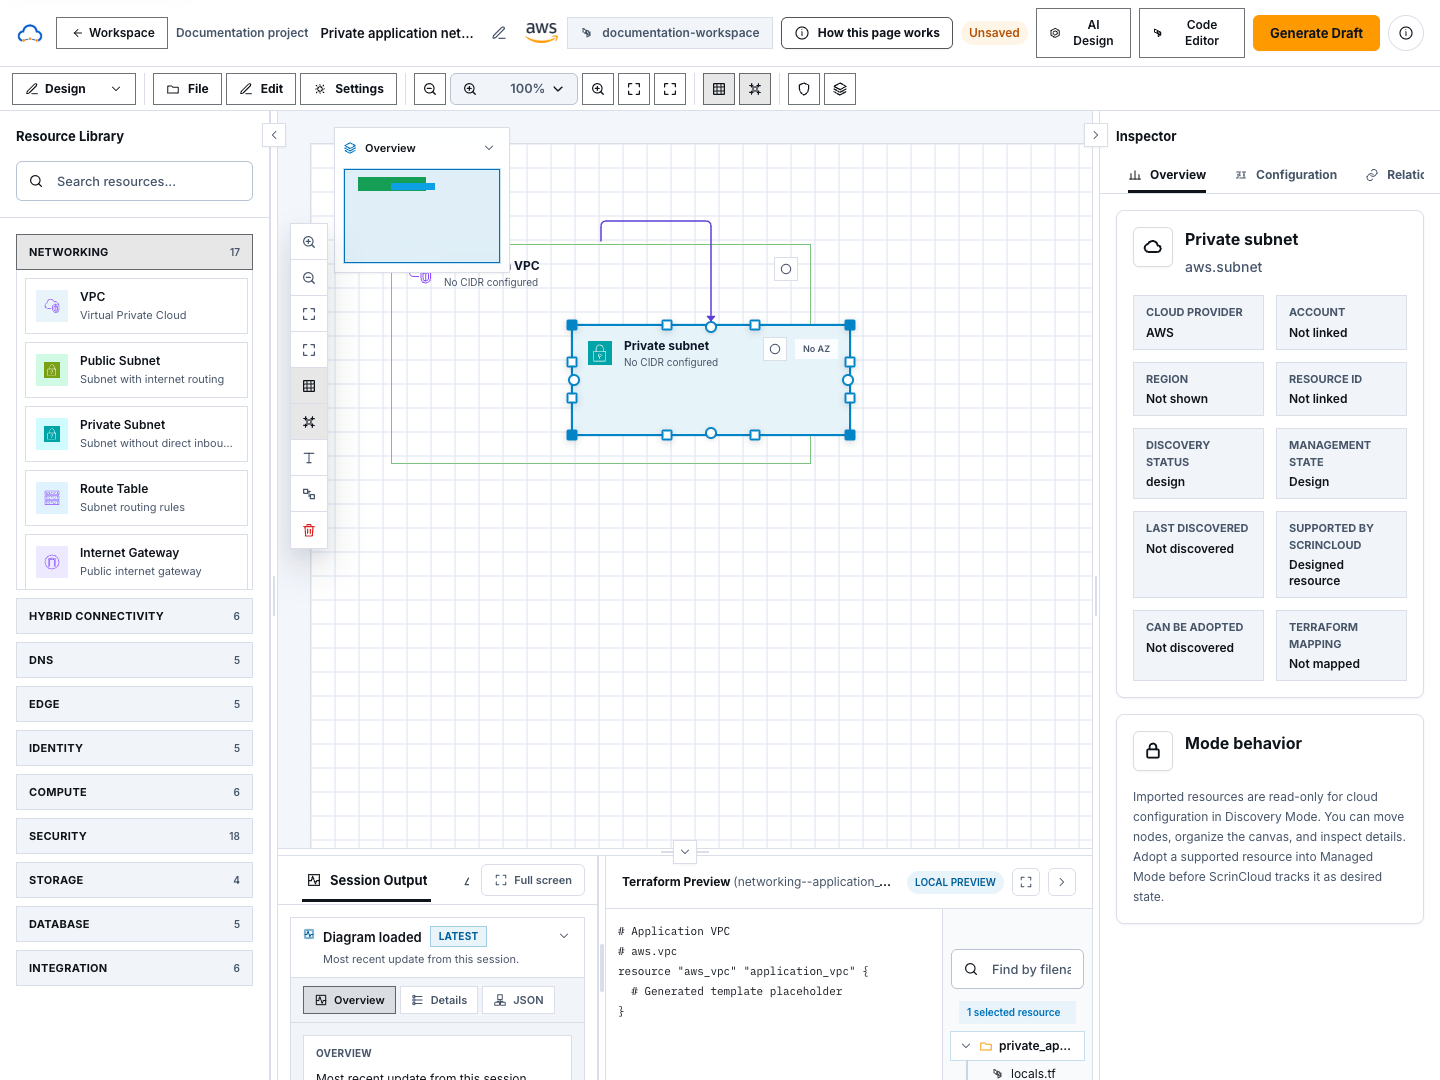
Section titled “Step 6: Organize the canvas for review”A reviewer should be able to understand the system without moving every card.
- Group related resources visually.
- Keep parent boundaries larger than the resources they contain.
- Avoid crossing connections where possible.
- Use multi-select when moving a related group.
- Use the layout or alignment controls when they improve readability.
- Choose Fit Content to bring the full design into view.
- Use zoom and the minimap for navigation, not to hide disconnected resources.
- Add annotations only when they explain ownership, traffic, trust, or another useful design fact.
Keep names short enough to scan but specific enough to distinguish resources.
Step 7: Save and review the revision
Section titled “Step 7: Save and review the revision”- Open File and choose Save, or use the supported save shortcut.
- Wait for the header to show Saved.
- Open Revision history.
- Confirm the latest revision time and diagram name.
- Close revision history without restoring anything unless you intentionally need an earlier version.
- Reopen one or two important resources and verify their properties.
- Use Fit Content for a final whole-design review.
If a conflict banner appears, read it before choosing reload or overwrite. Confirm whether another editor saved a newer revision. Do not overwrite another person’s work merely to clear the message.
Check your result
Section titled “Check your result”The design is ready for the next guide when:
- the correct project and workspace are visible;
- every resource belongs in the intended design;
- relationships represent real supported dependencies;
- required properties are complete and contain no secrets;
- the full architecture is readable at Fit Content; and
- the header shows Saved for the revision you want to test.
Common blockers
Section titled “Common blockers”The canvas is read-only
Section titled “The canvas is read-only”Your role or current resource state does not permit edits. Ask a project administrator for the appropriate access. Do not copy or import the diagram to bypass the restriction.
A resource is missing from the library
Section titled “A resource is missing from the library”Confirm the project provider and search by the provider service name. If the resource type is not supported, record it as a known design limitation rather than replacing it with an inaccurate resource.
Two resources will not connect
Section titled “Two resources will not connect”The relationship may be unsupported, the direction may be wrong, or the selected handles may not be compatible. Read the Inspector guidance and run a design check instead of drawing an arbitrary line.
Save fails
Section titled “Save fails”Keep the page open, read the notification, confirm your connection and access, then try again. If a version conflict is shown, compare the newer revision before deciding how to continue.
The diagram becomes difficult to navigate
Section titled “The diagram becomes difficult to navigate”Use Fit Content, the minimap, alignment tools, and smaller logical groups. Do not solve readability problems by deleting required relationships.
Continue
Section titled “Continue”Use canvas actions safely for the complete File, Edit, revision, import, and download action boundaries.
Use the Inspector’s Validation tab to check the saved design.
Continue with Validate a design.