
Build your first architecture
Architecture Studio is the visual workspace for designing cloud infrastructure. The canvas keeps resources, relationships, properties, validation, and Terraform context attached to the intended project and workspace.
- Typical time
- 15–20 minutes
- You need
- A project workspace
- Next step
- Open the code editor
Choose Architecture Studio
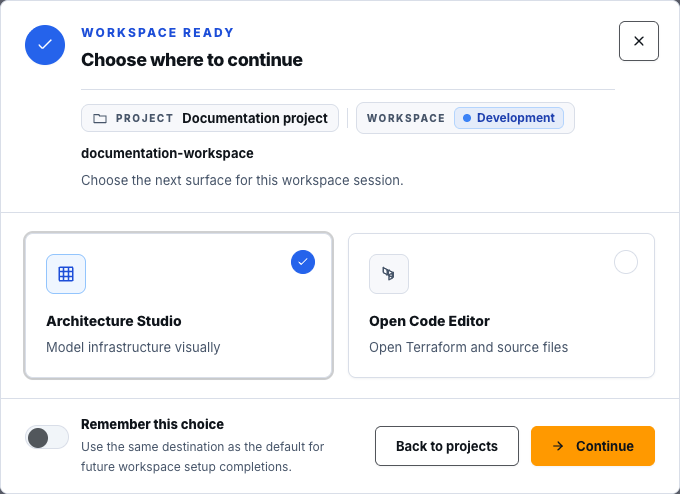
Section titled “Choose Architecture Studio”After project setup, ScrinCloud opens Choose where to continue.
- Confirm the project and workspace shown in the dialog.
- Select Architecture Studio.
- Optionally enable Remember this choice if the canvas should be your default destination.
- Choose Continue.
Select Open Code Editor only when you want to start from Terraform files. This guide begins visually and moves to code after the first design is saved and validated.
Confirm the canvas context
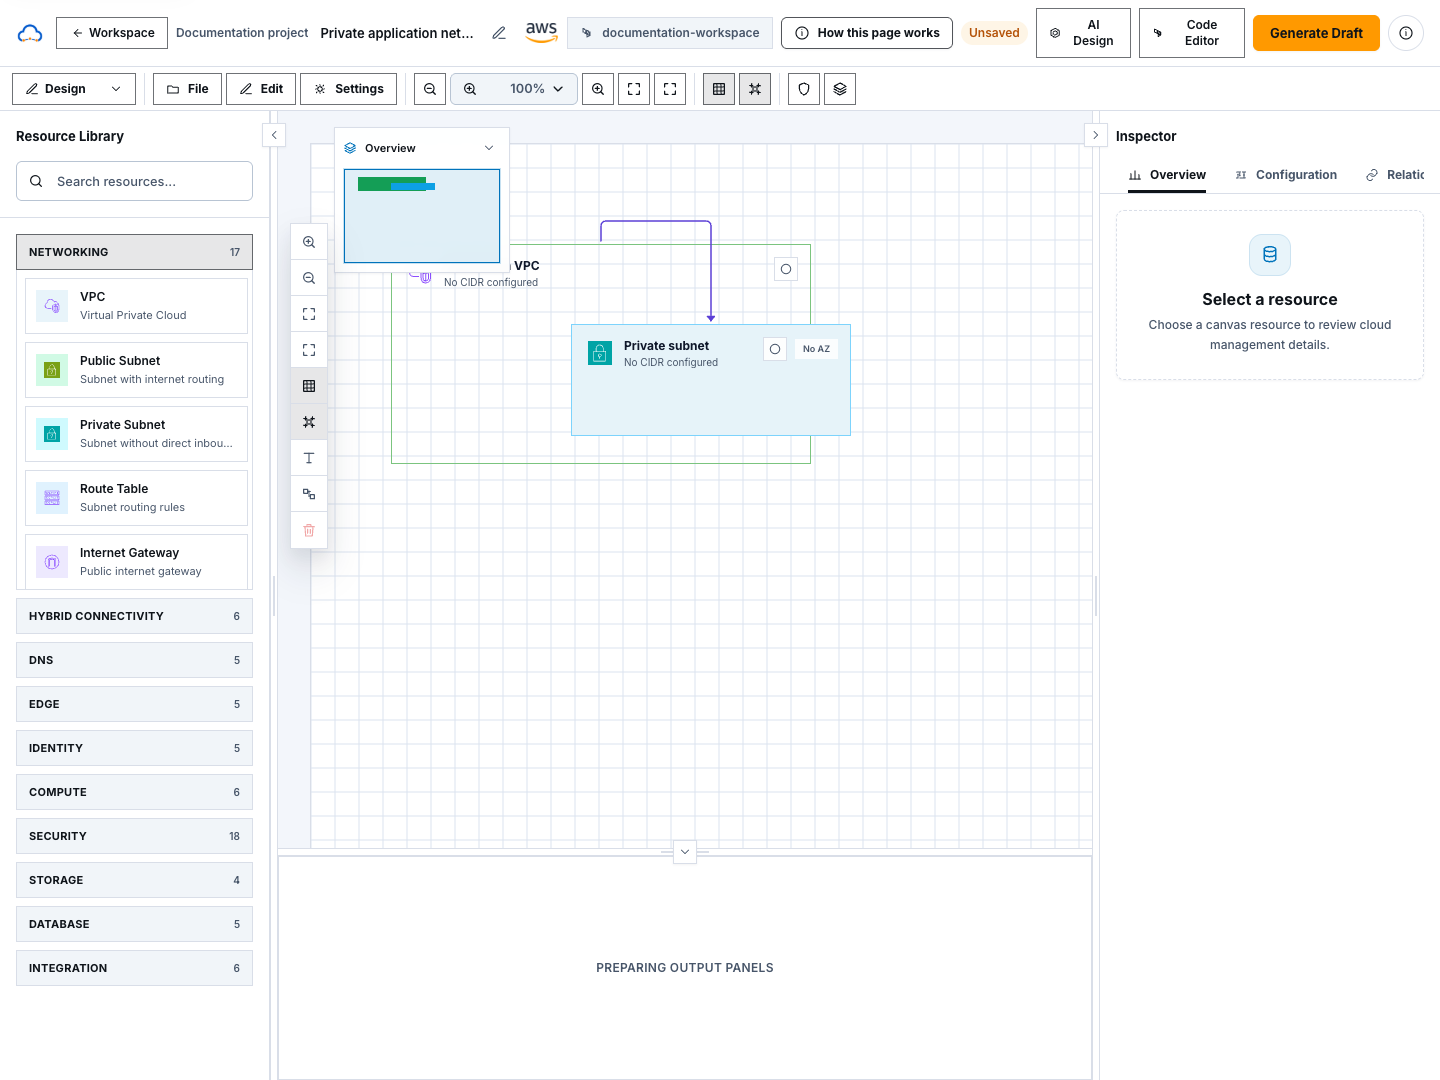
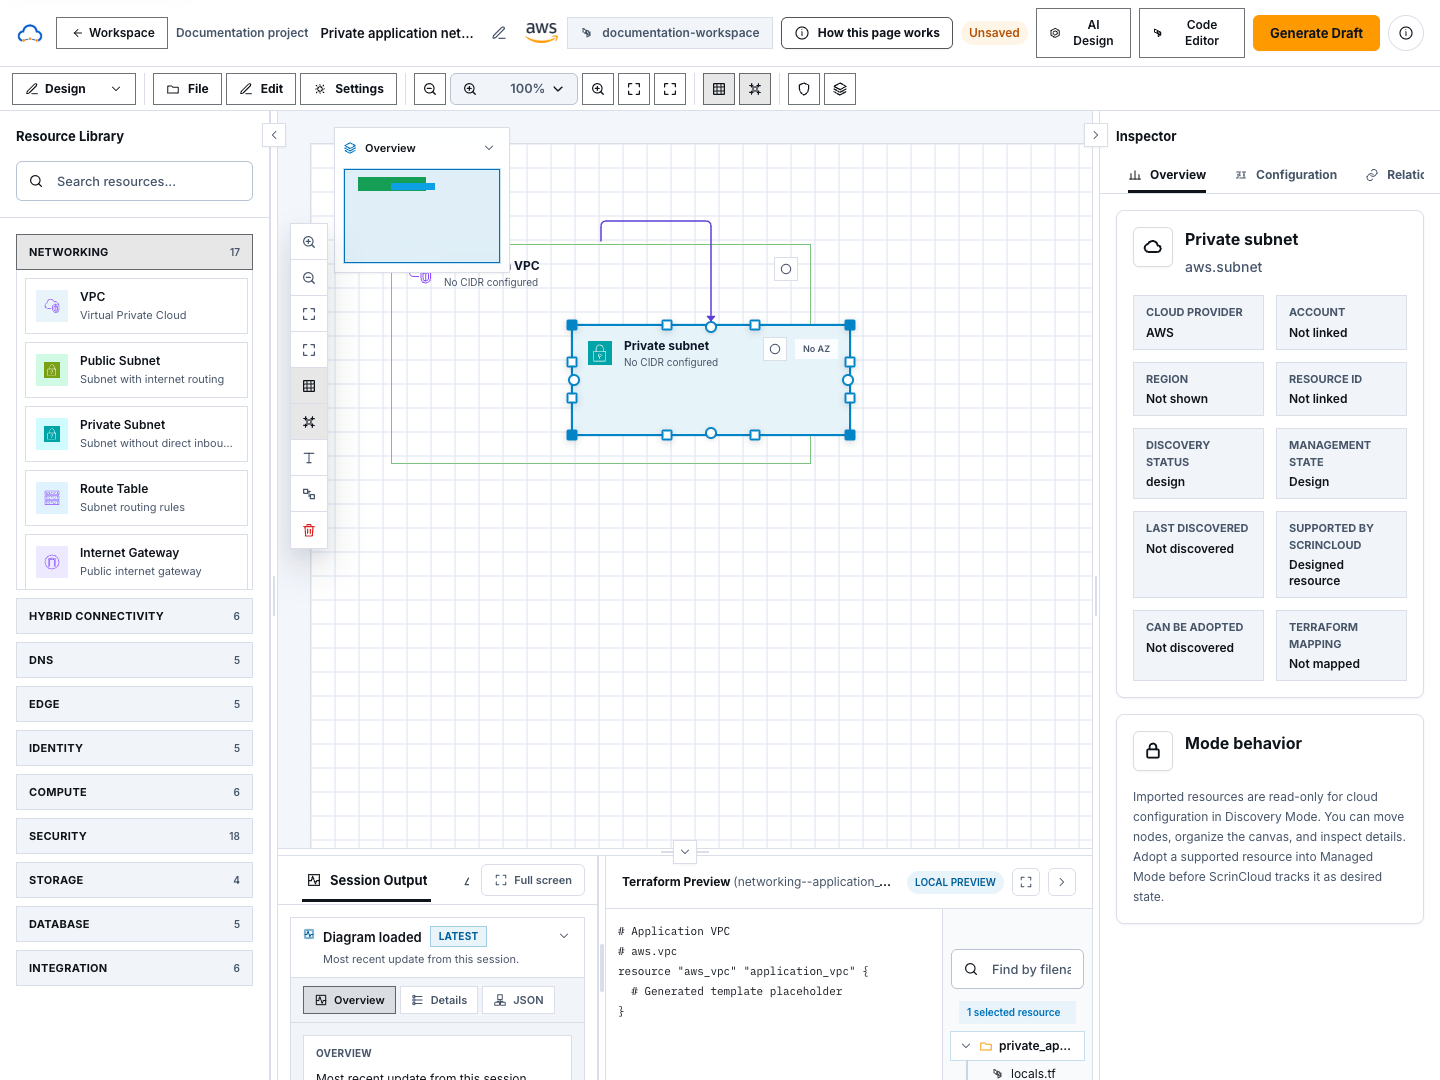
Section titled “Confirm the canvas context”Before adding anything, look at the canvas header:
- Confirm the project or architecture name.
- Confirm the cloud provider.
- Confirm the active Terraform workspace name.
- Check that the page is not marked Read only.
- Notice the save status. A new or changed diagram may show an unsaved state.
If the workspace is wrong, use Switch workspace before editing. Do not design in one workspace and assume the Terraform code editor is attached to another.
Understand the main areas
Section titled “Understand the main areas”- Resource library: search and browse approved provider resources.
- Canvas: place resources and show their relationships.
- Inspector: configure the selected resource and review validation or workflow results.
- Toolbar: control zoom, grid, layout, validation, and saved diagrams.
- Header: show project/workspace context, save state, Code Editor, and the primary workflow action.
Add two related resources
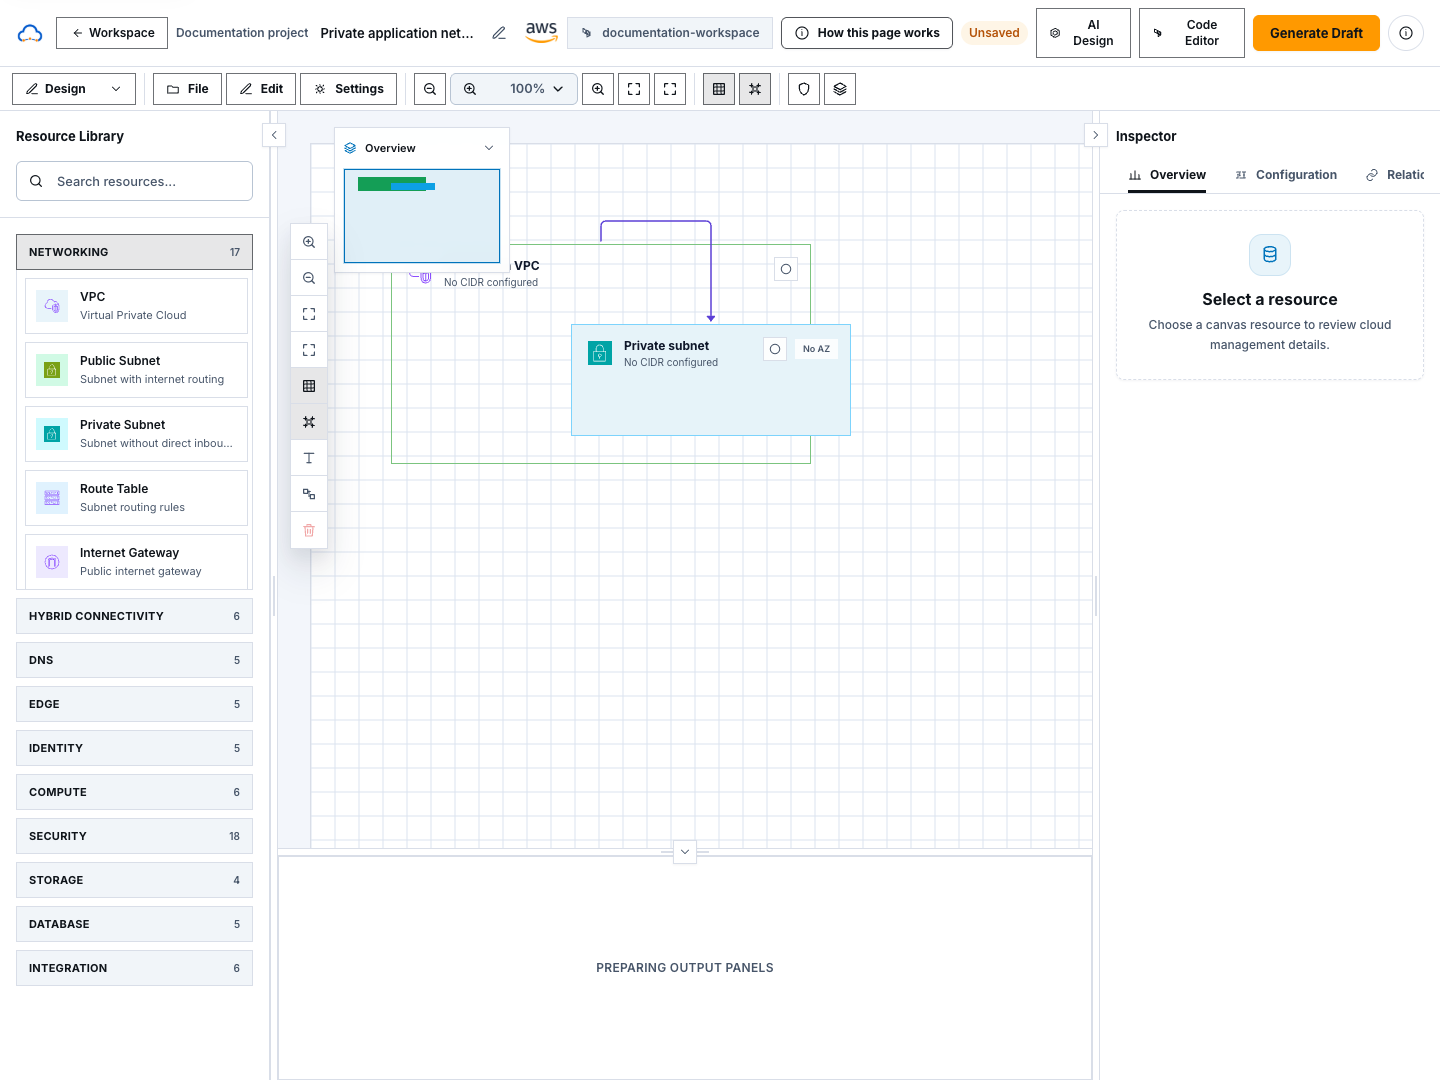
Section titled “Add two related resources”Start with a small design that is easy to understand.
- For AWS, use an approved VPC and Subnet when available.
- For Azure, use an approved Virtual Network and Subnet when available.
Your organization’s catalogue may use more specific labels.
- In the resource library, use Search resources….
- Find the first network boundary resource.
- Drag it onto the canvas.
- Search for its child or related resource.
- Drag the second resource onto the canvas.
- Move the cards until the design is readable.
- Use Fit Content if the resources are outside the visible area.
Adding a card describes intended architecture. It does not create the resource in AWS or Azure.
Configure required properties
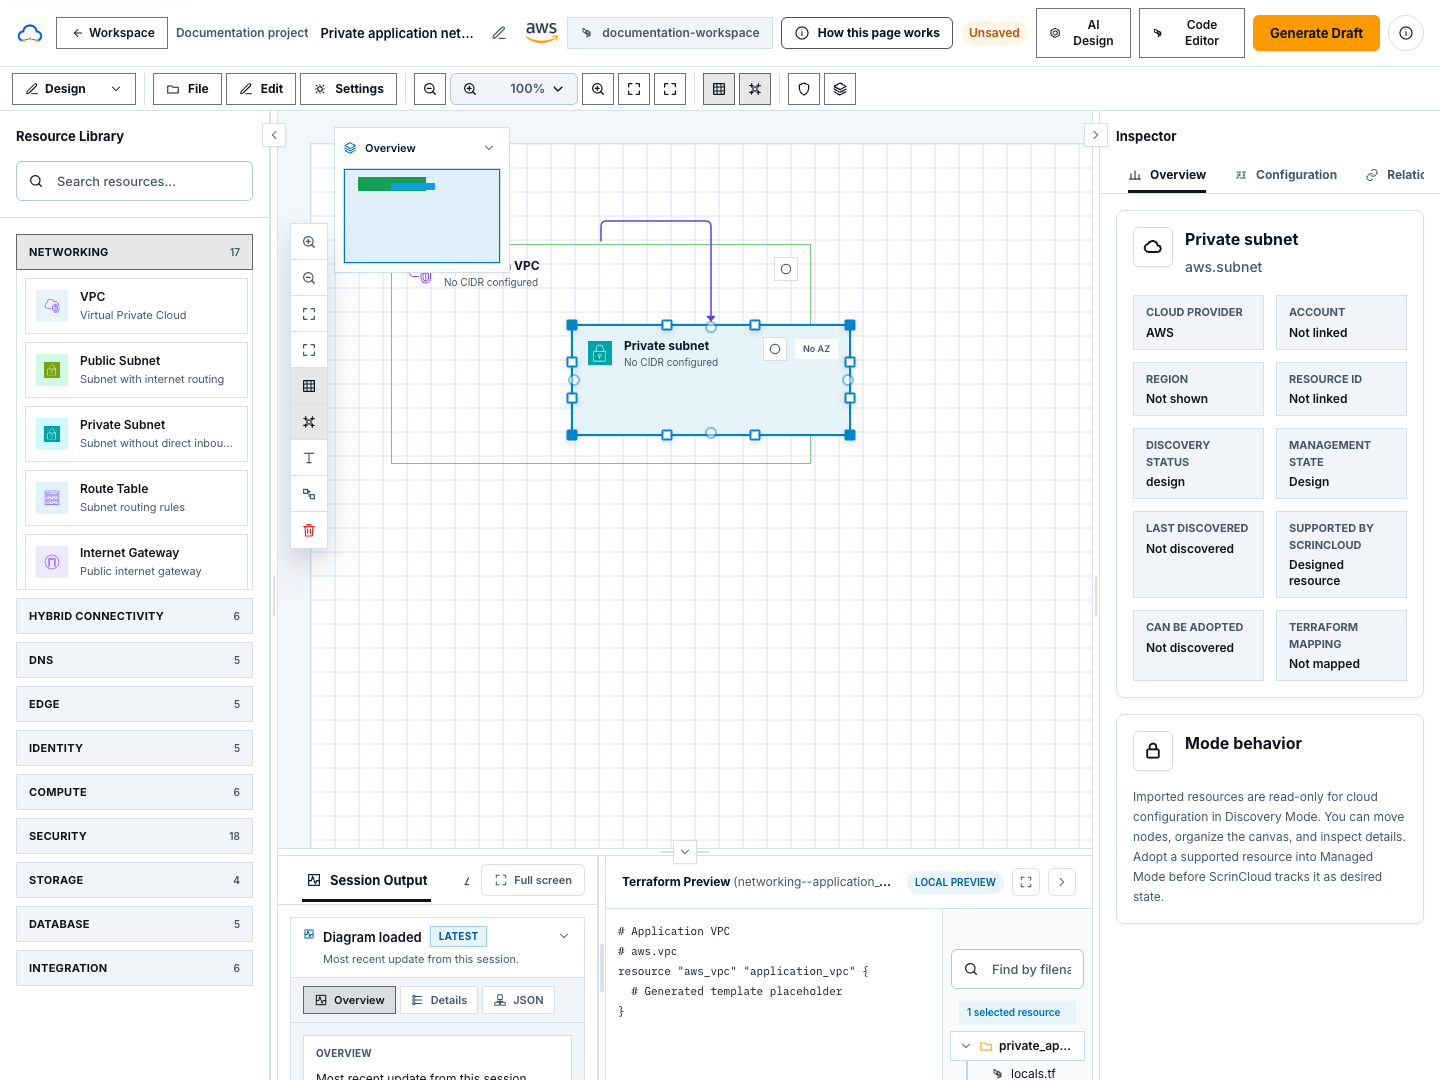
Section titled “Configure required properties”- Select the first resource on the canvas.
- Open its properties in the Inspector.
- Read each required field and helper message.
- Enter only non-sensitive configuration.
- Repeat for the second resource.
- Give resources clear display names.
- Confirm the provider, environment, region, and address ranges are intentional.
For a network example, use private, documentation-safe CIDR ranges such as
10.20.0.0/16 and a contained subnet such as 10.20.1.0/24 when those fields
are required. Follow your organization’s real address plan for actual work.
Never put credentials, access tokens, private keys, or secrets in resource properties.
Connect the resources
Section titled “Connect the resources”Connections should represent real supported relationships.
- Hover over or select the parent resource to reveal connection handles.
- Drag from the appropriate handle to the related resource.
- Release when the target highlights.
- Select the connection and review any available relationship details.
- Remove and recreate it if the direction or relationship is wrong.
Do not draw a line merely to improve the picture. The relationship becomes part of validation and Terraform context.
Save the diagram
Section titled “Save the diagram”- Open File and choose Save, or use Ctrl+S.
- Wait for the header status to show Saved.
- If a conflict warning appears, read it before choosing reload, overwrite, or another action.
- Save again after any later change that you want included in validation or Terraform generation.
A saved revision creates durable lineage. Validation requires the current diagram revision and automatically saves eligible unsaved changes before checking the design.
Run Architecture Validation
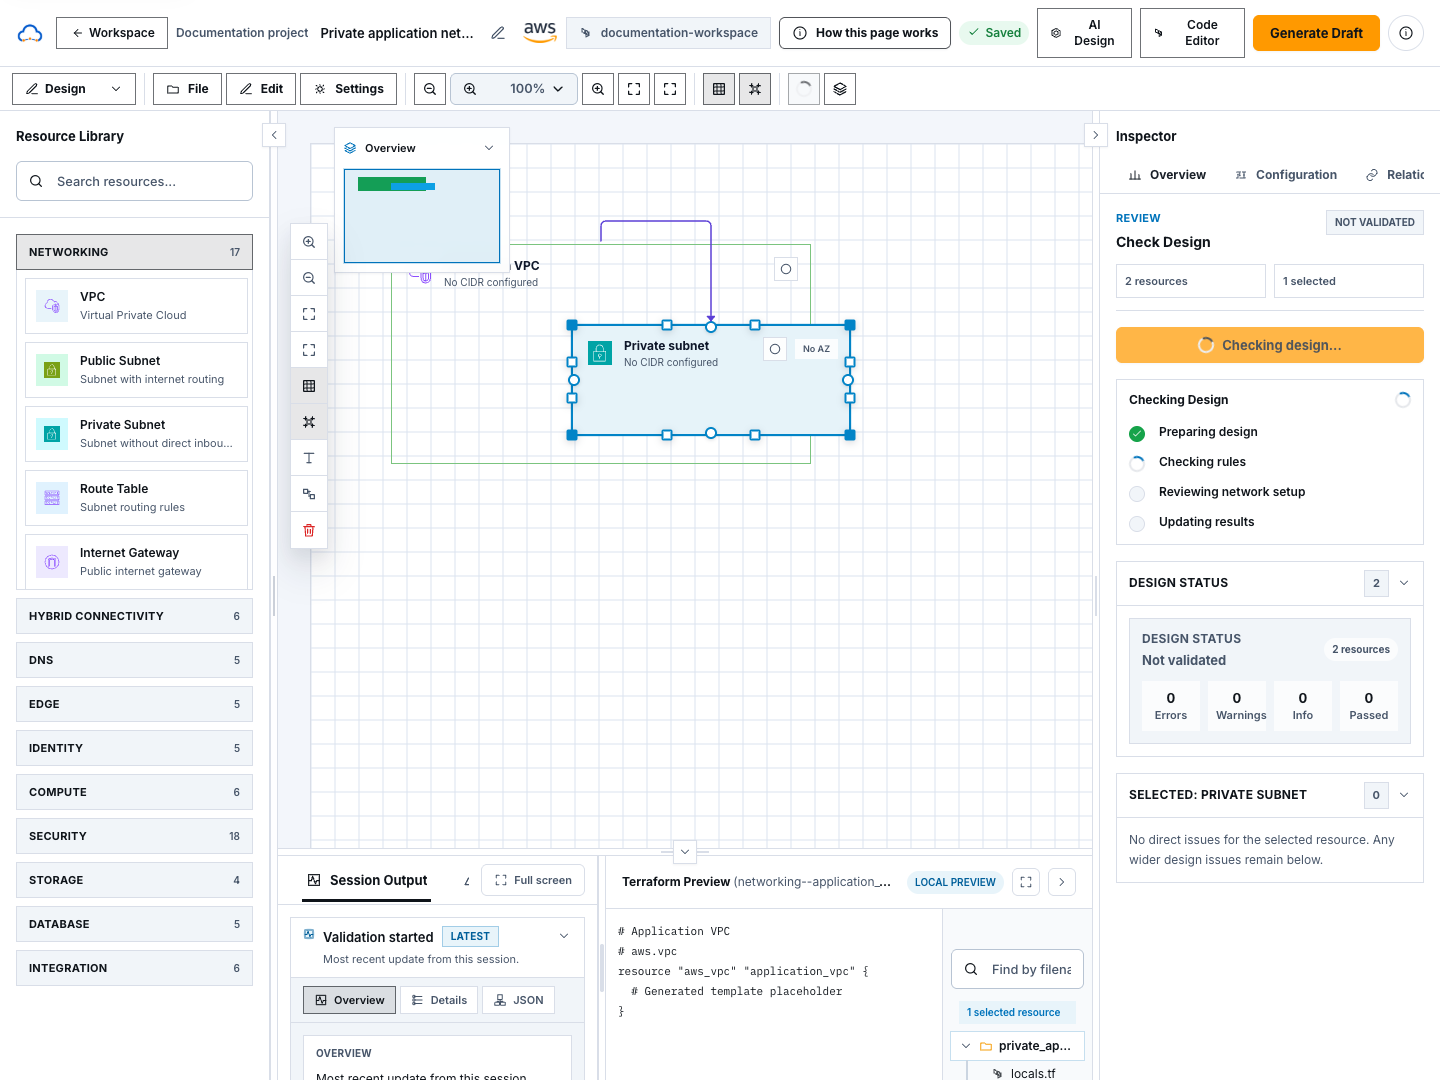
Section titled “Run Architecture Validation”- Choose Validate in the canvas toolbar.
- Wait while ScrinCloud saves when necessary and checks the design.
- Confirm the Validation tab opens in the Inspector.
- If you opened the tab directly instead, choose Check Design.
- Read each finding:
- affected resource;
- severity;
- what the rule checks;
- why it matters; and
- the recommended fix.
- Correct the design and run validation again.
The rules engine decides whether a configuration passes. AI assistance may explain a result, but it does not override the rule or authorize delivery.
Check your result
Section titled “Check your result”You are ready to continue when:
- the correct project and workspace are active;
- the diagram shows the intended resources and relationships;
- the header says Saved;
- Architecture Validation has completed for the saved revision; and
- you understand any remaining findings.
You do not need a perfect production architecture to learn the next step. You do need a saved design and a workspace linked to the project.
Common blockers
Section titled “Common blockers”The canvas is read-only
Section titled “The canvas is read-only”Your role or the current workspace state does not allow editing. Ask a project administrator for the appropriate access. Do not duplicate the diagram to bypass a lock or permission boundary.
Code Editor is disabled
Section titled “Code Editor is disabled”The header requires a linked Terraform workspace. Return to Set up a workspace and open the project with that workspace.
A resource cannot be connected
Section titled “A resource cannot be connected”The selected relationship may not be supported, or the wrong handles may be in use. Read the relationship guidance and validation message rather than forcing an arbitrary line.
Validation reports an error
Section titled “Validation reports an error”Select the affected resource, update the named property or relationship, save, and validate again. Do not remove a finding by disabling a guardrail unless that change is approved.
Validate or Check Design is missing
Section titled “Validate or Check Design is missing”The toolbar action should open Validation, where Check Design runs the same deterministic validation workflow. If neither control is present, stop and report the page, workspace, and missing label. Do not use an unrelated workflow or AI action as a replacement.
The workspace shown in the header is wrong
Section titled “The workspace shown in the header is wrong”Use Switch workspace before opening the code editor. Confirm environment, provider, and workspace name again after switching.
Continue
Section titled “Continue”Choose Code Editor in the Architecture Studio header. It opens the Terraform editor for the active project and workspace.
Continue with Use the Terraform code editor.