
Manage environments and variables
Settings → Environment manages reusable environment definitions and Terraform values at organization, project, or workspace scope. Secret-backed values are write only: ScrinCloud does not return them to the browser after save.
- Typical time
- 10–20 minutes
- You need
- Environment-management permission for the selected scope
- Outcome
- A scoped environment with reviewed variables
Step 1: Select the exact scope
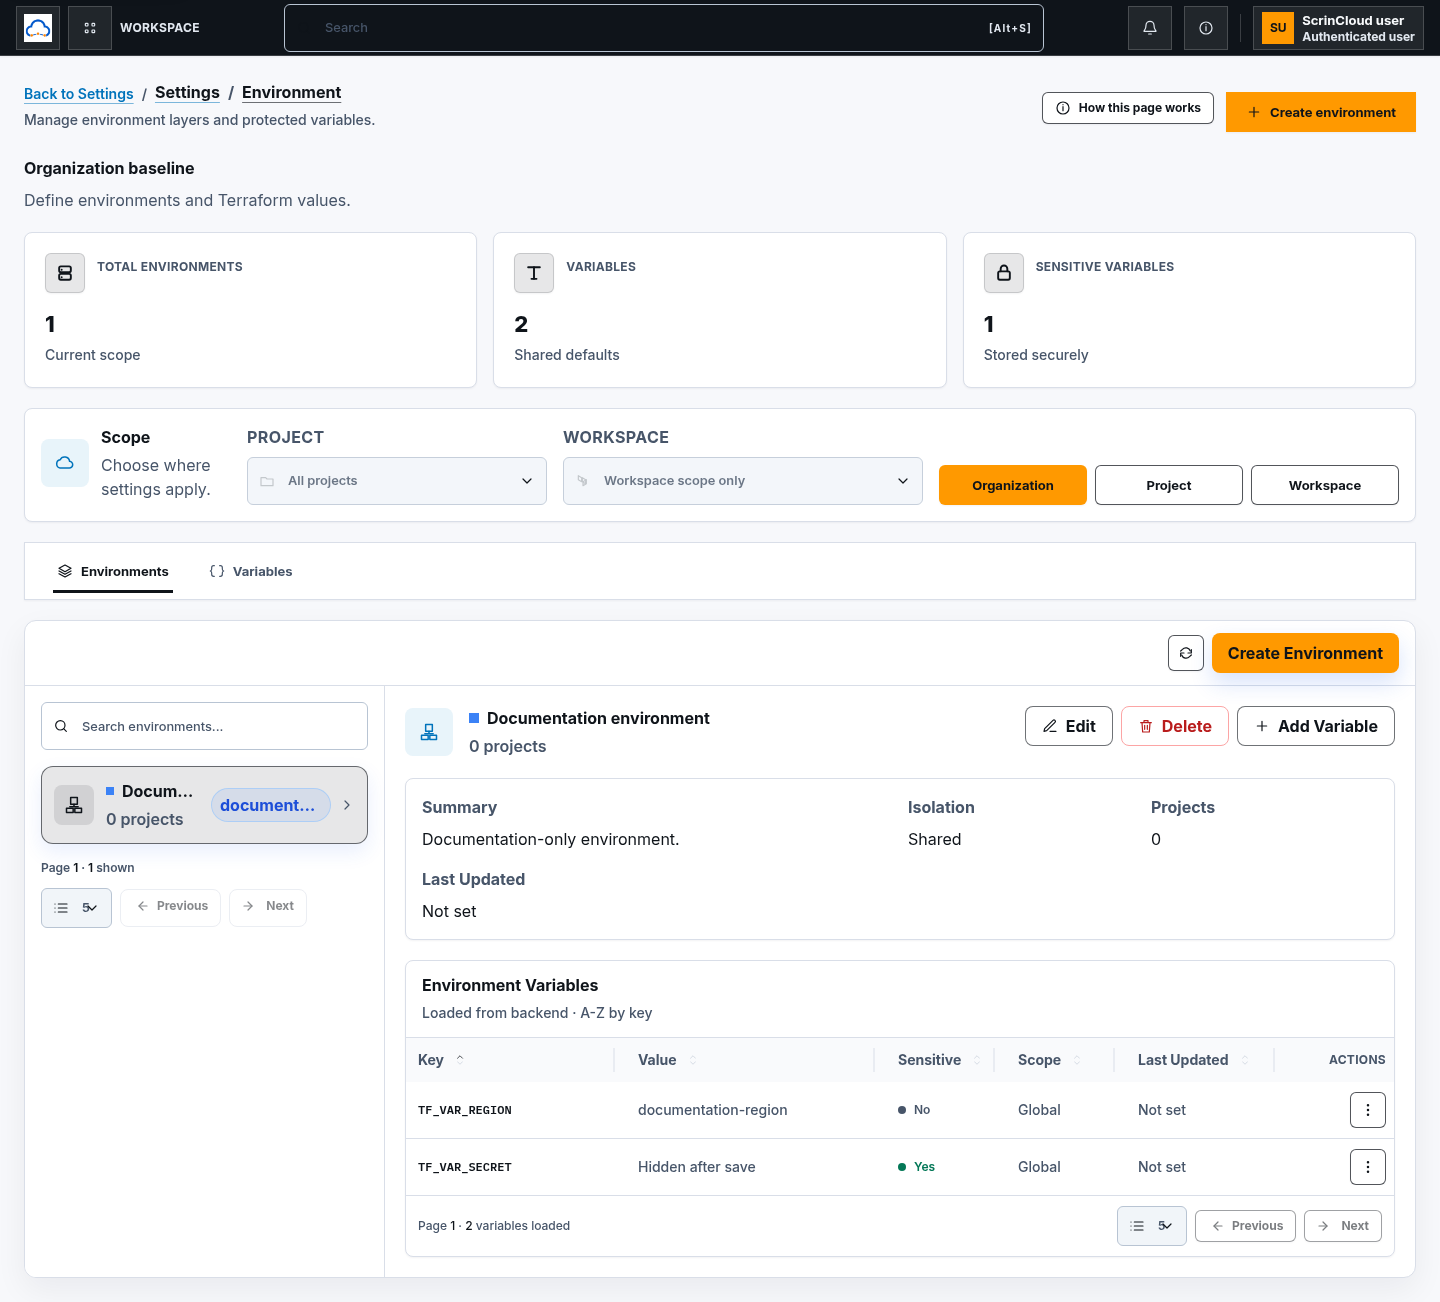
Section titled “Step 1: Select the exact scope”Open Settings → Environment and choose:
- Organization for the shared baseline;
- Project for one selected project; or
- Workspace for one workspace inside a selected project.
Choose the project before a workspace. Organization environments are always shared; workspace environments are always isolated. Project environments can use the available shared or isolated choice. Effective runner values resolve from organization to project to workspace, with the more specific matching key taking precedence.
Step 2: Find or create an environment
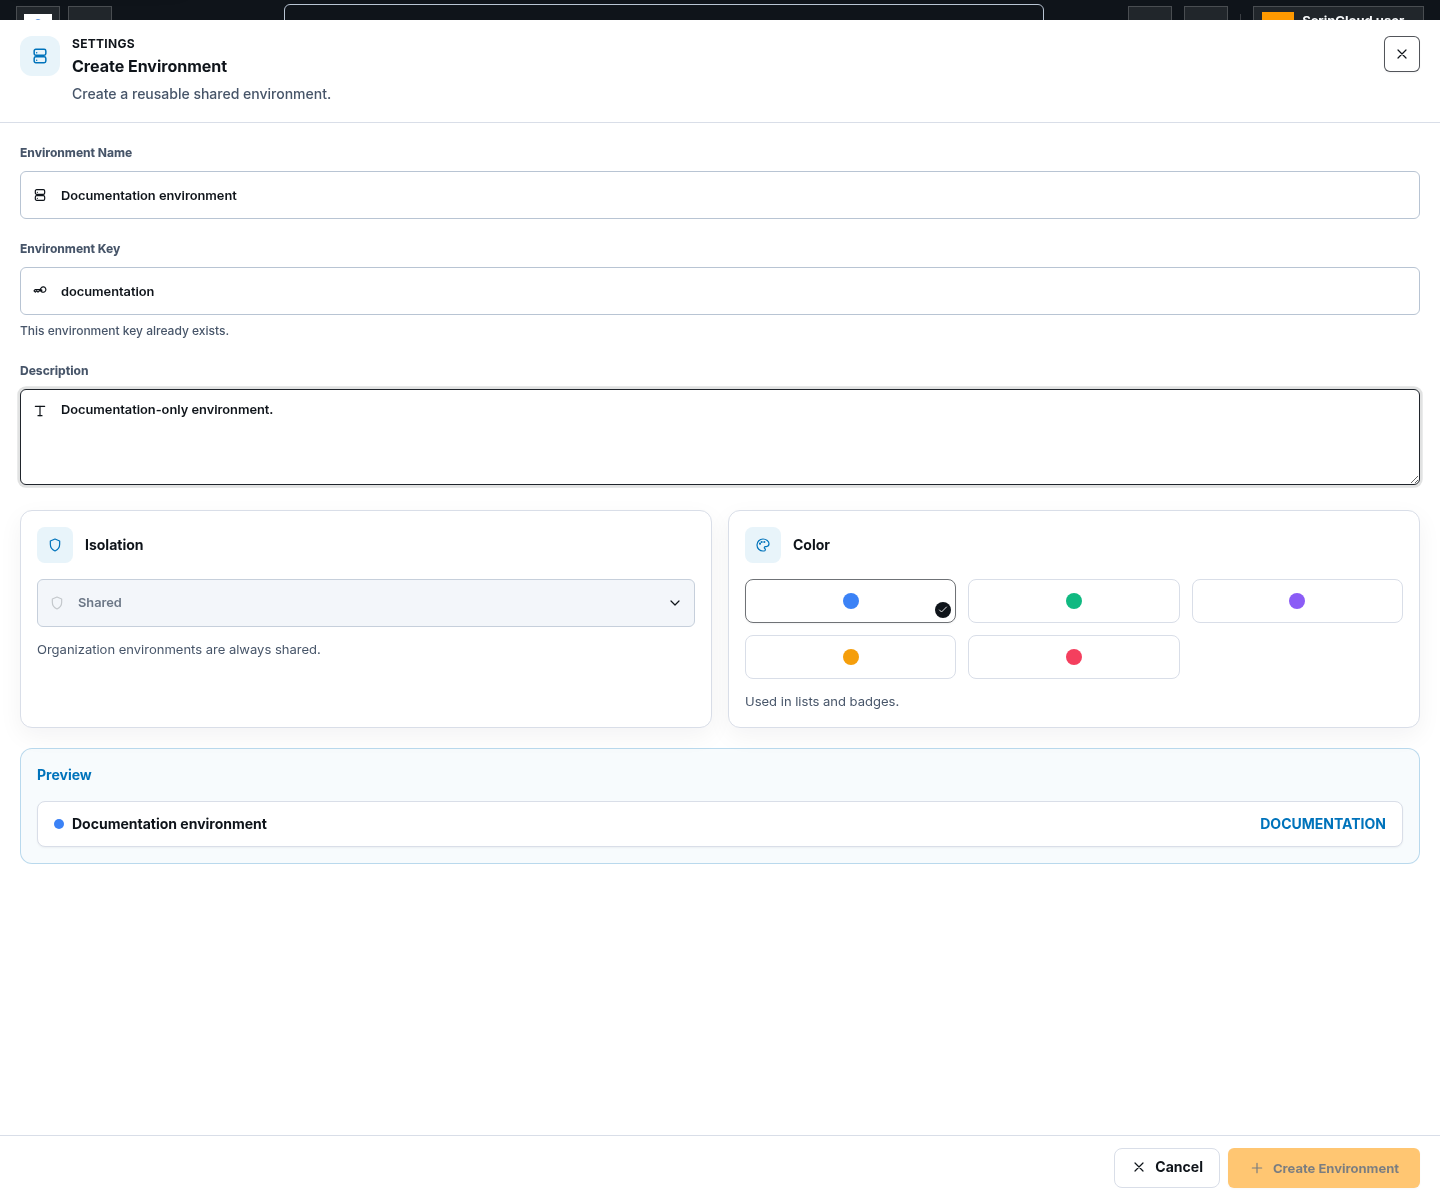
Section titled “Step 2: Find or create an environment”Use the Environments tab, search, page size, Previous, and Next to find a row. To create one:
- choose Create environment;
- enter Environment Name;
- review or edit the lowercase Environment Key;
- add an optional description;
- choose the permitted isolation and display color; and
- choose Create Environment.
The key must be unique inside the selected scope.
Step 3: Edit or delete an environment
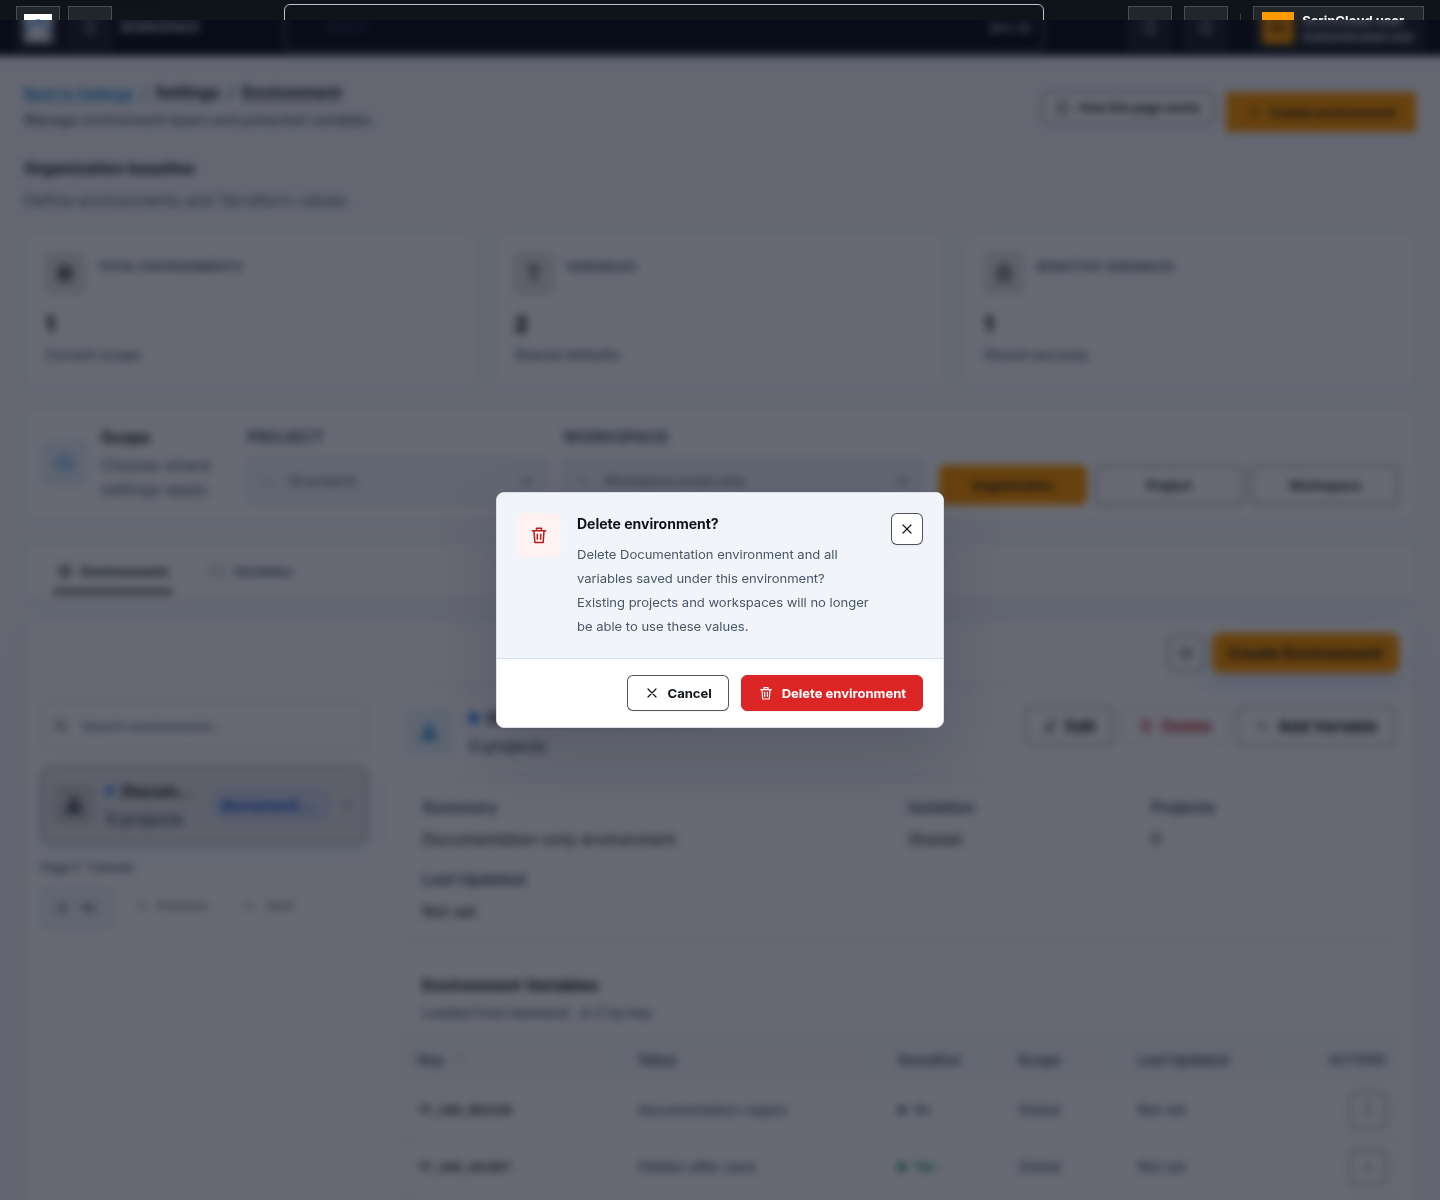
Section titled “Step 3: Edit or delete an environment”Select an environment and choose Edit Environment to update its supported fields. Choose Delete Environment only after reviewing the confirmation.
Deleting an environment can remove its environment record and associated variable configuration from ScrinCloud. If it contains sensitive variables, the backend requires protected verification before completing the deletion. It does not delete cloud resources or Terraform state.
Step 4: Add a non-secret variable
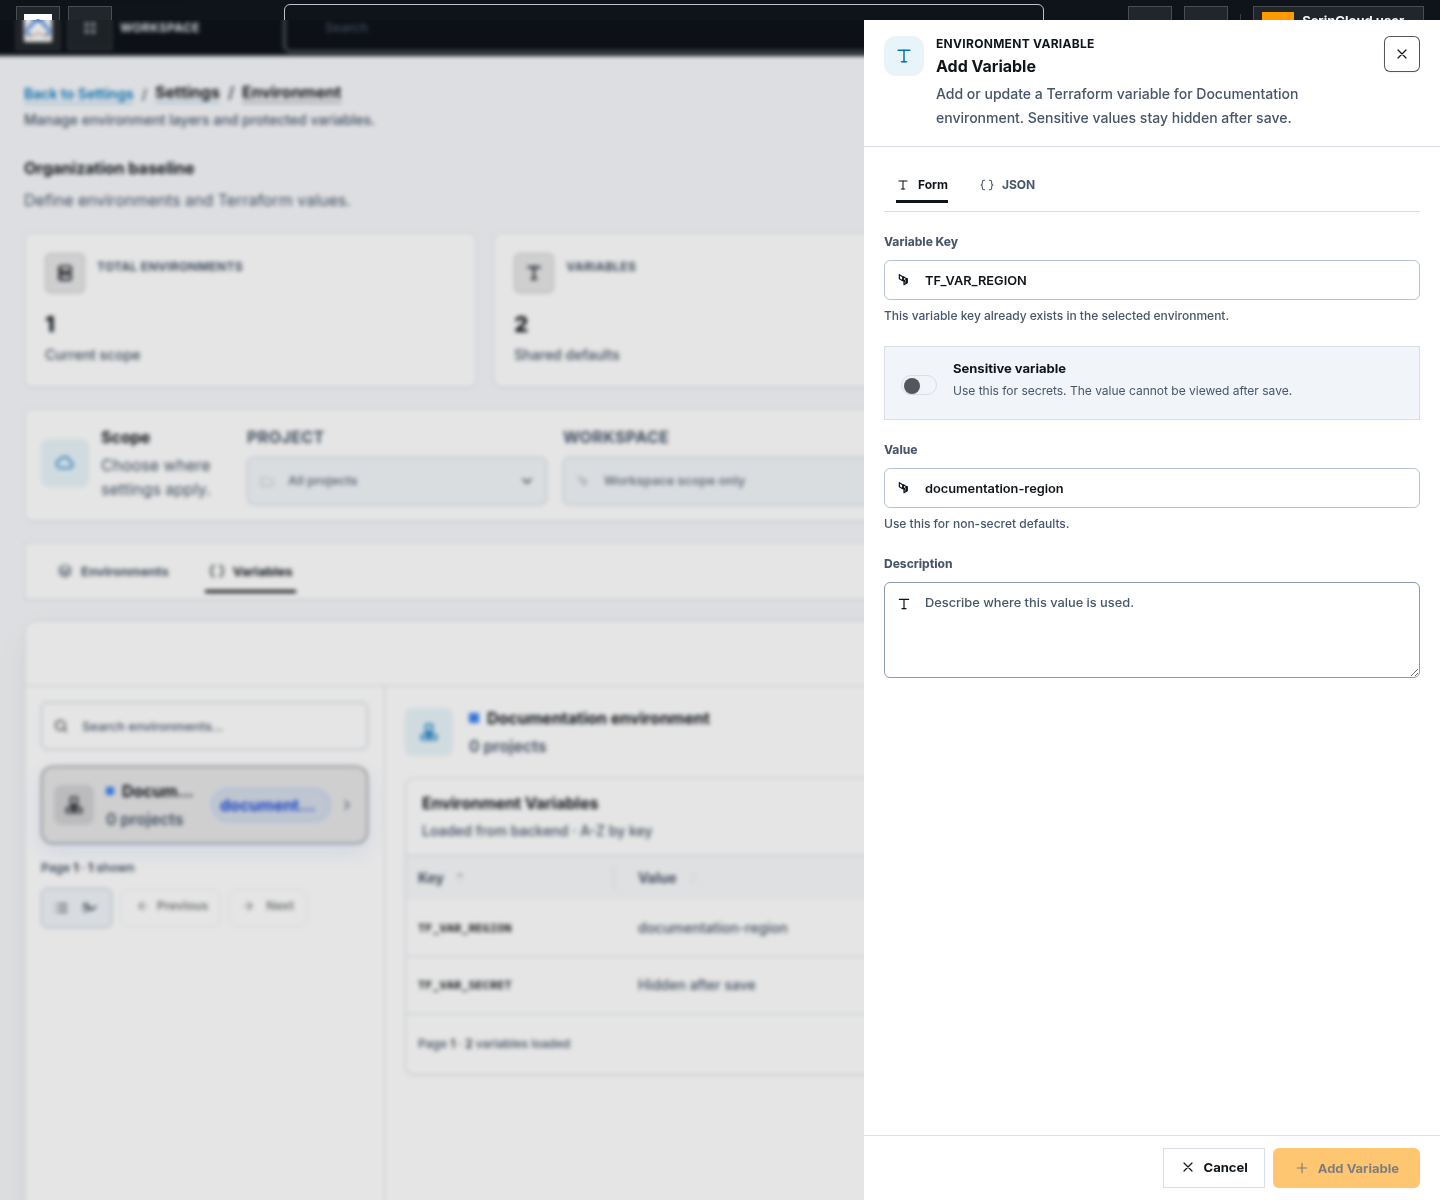
Section titled “Step 4: Add a non-secret variable”Open Variables, select the environment, and choose Add Variable.
- use Form or JSON mode;
- enter an uppercase Terraform-style key such as
TF_VAR_REGION; - leave Sensitive variable off;
- enter the non-secret value and optional description; and
- choose Add Variable.
The JSON editor accepts only key, sensitive, value or secret_value, and
description. Duplicate keys and invalid JSON are rejected.
Step 5: Add or update a sensitive variable
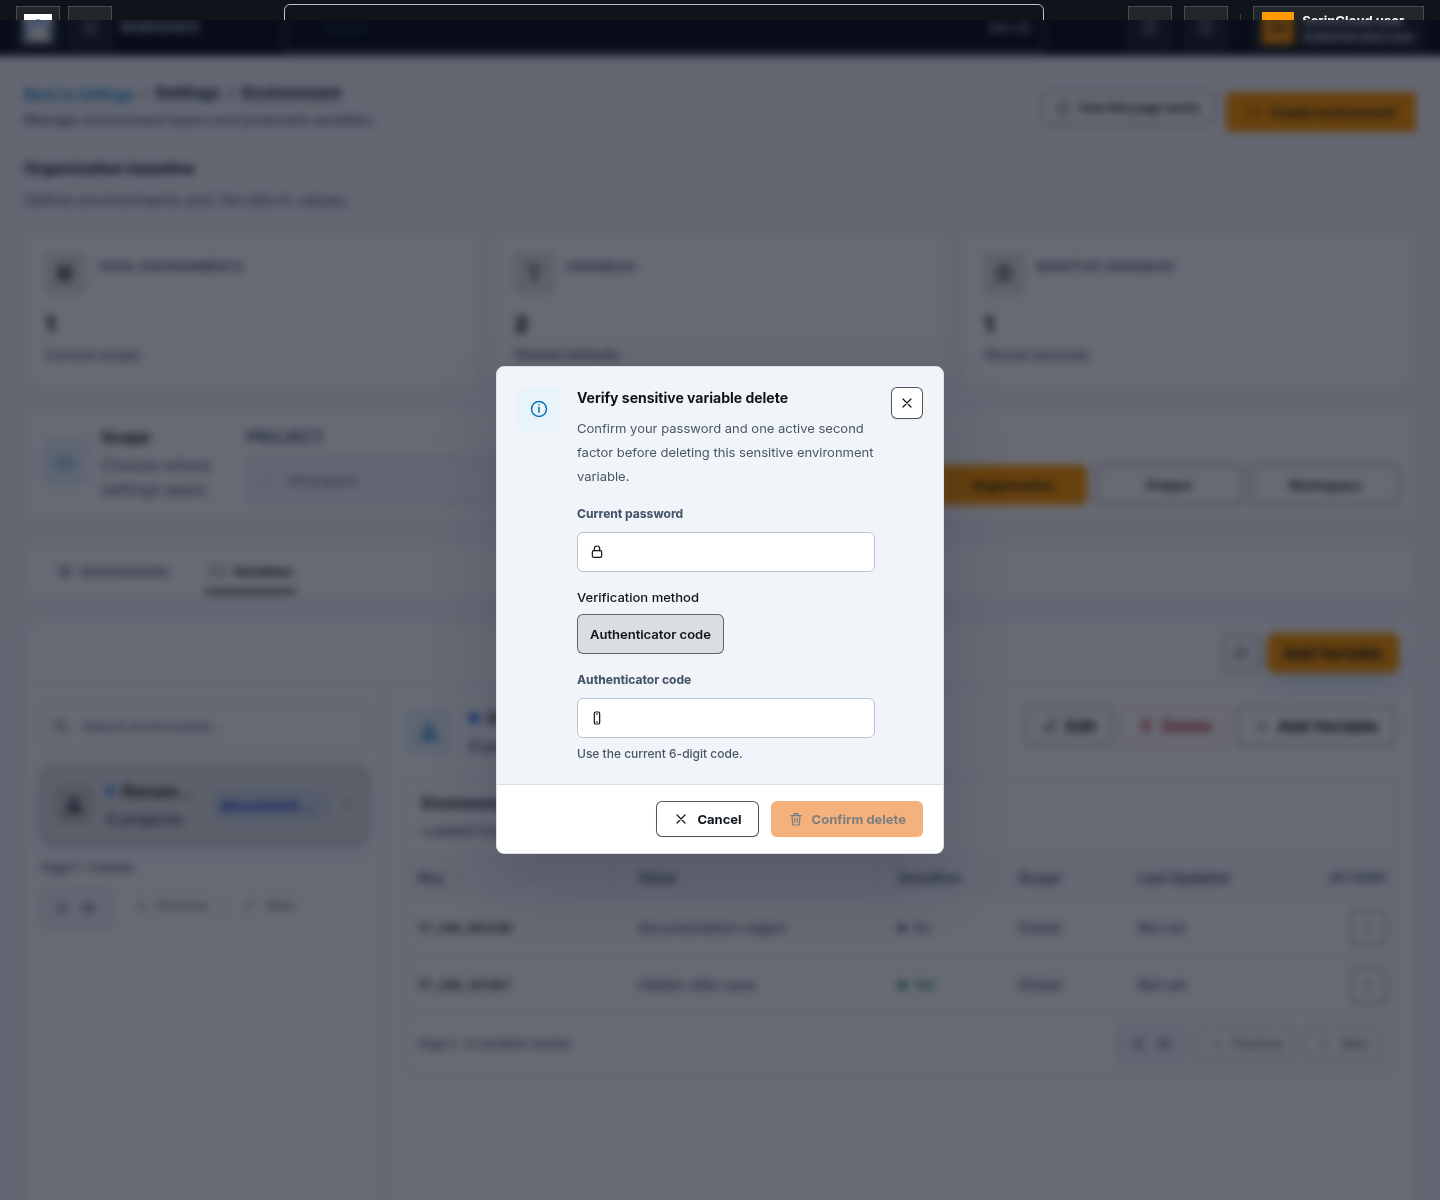
Section titled “Step 5: Add or update a sensitive variable”Turn on Sensitive variable for a credential-like or otherwise secret value. Enter the value once and save. The table shows Hidden after save, not the plaintext value.
Protected secret changes require:
- your current password;
- an active eligible second factor; and
- completion of the protected verification dialog.
When editing an existing sensitive value, leave the secret field blank to keep the current value. Secret-like keys must be marked sensitive.
Step 6: Edit, delete, and page variables
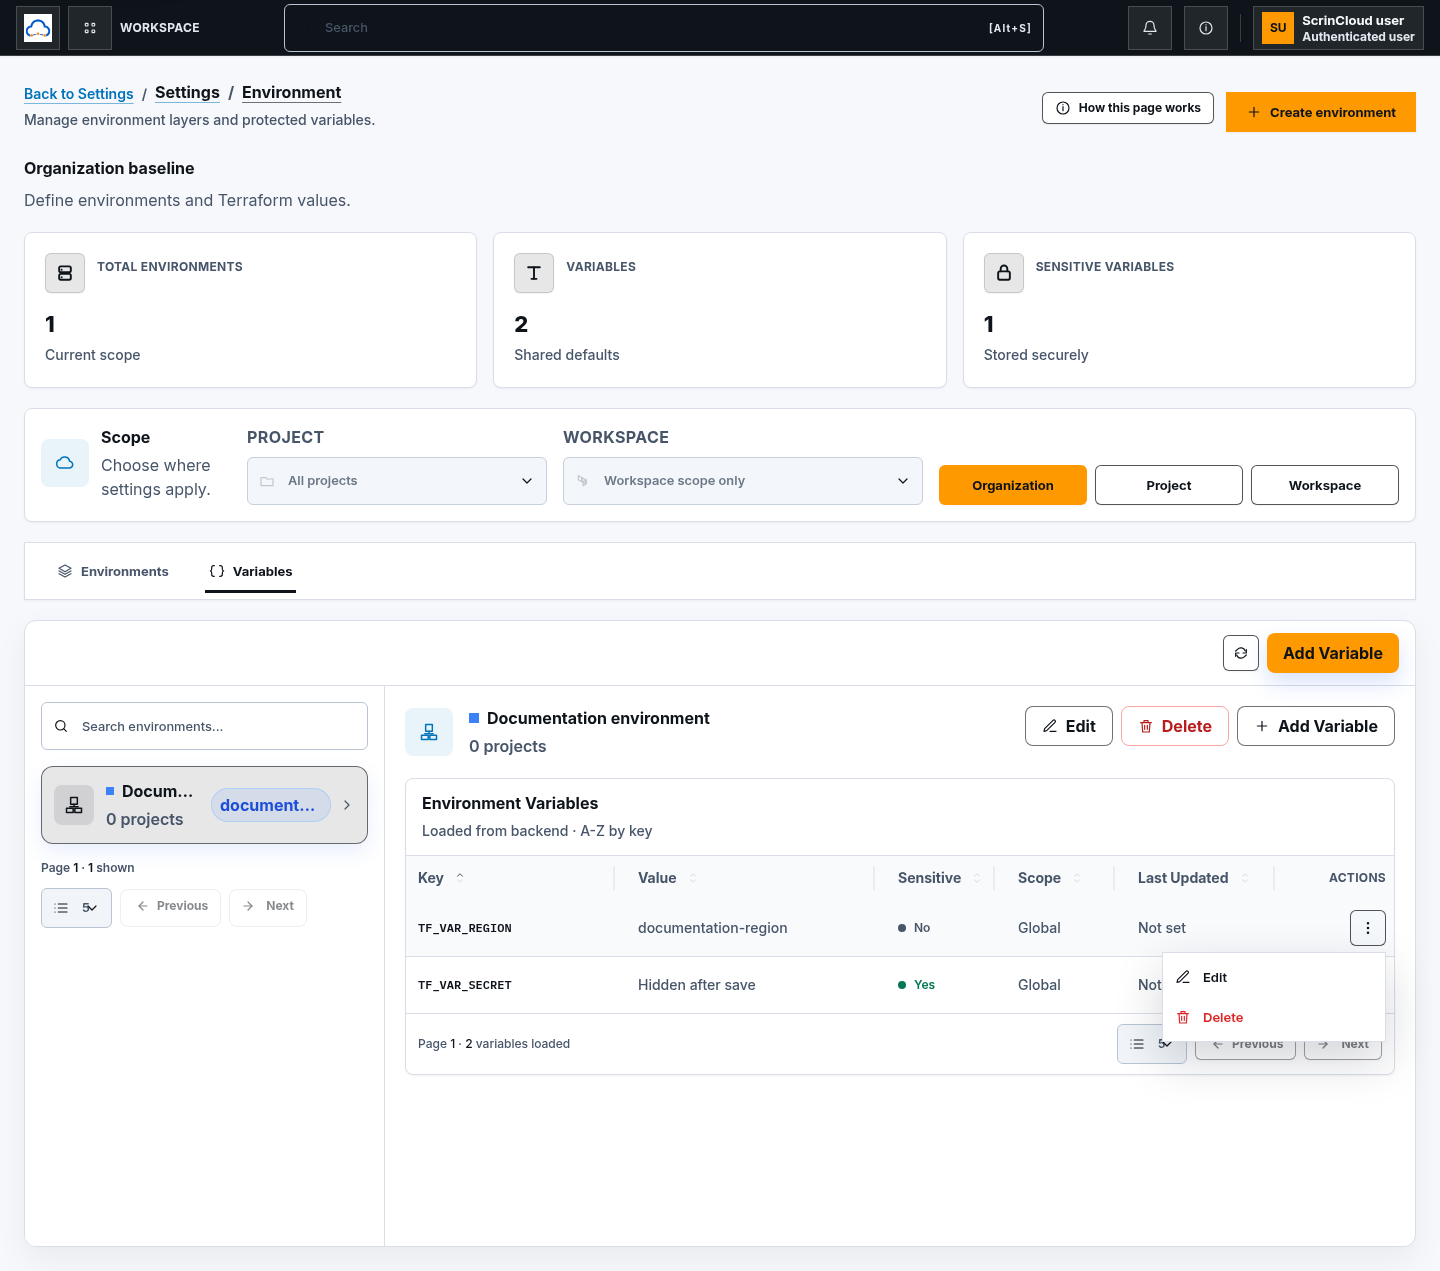
Section titled “Step 6: Edit, delete, and page variables”Open the variable row menu:
- Edit changes the supported metadata or value.
- Delete removes the variable after confirmation.
Sensitive edits and deletions require protected verification. Use page size, Previous, and Next to review every backend page. Refresh after a concurrent change before retrying.
Check your result
Section titled “Check your result”Reload the same scope and confirm the environment key, isolation, variable key, sensitive status, and page totals. For runner behavior, verify the effective variables for the intended project, workspace, and environment through an authorized workflow. Source or deployment wiring without live runtime evidence does not prove a runner received the value.
Common blockers
Section titled “Common blockers”Project or workspace actions are disabled
Section titled “Project or workspace actions are disabled”Select a project. Workspace scope also requires an existing selected workspace.
The key already exists
Section titled “The key already exists”Environment and variable keys must be unique inside their selected scope. Edit the existing record or choose a different key.
Secret verification is required
Section titled “Secret verification is required”Enable two-factor authentication on your own account, then complete the protected verification. Never work around it by saving a secret-like value as plain text.