
Configure policy guardrails
Policy guardrails turn organization expectations into checks that can be reviewed consistently. They help teams find unsafe or unapproved changes before delivery.
- Typical time
- 10–15 minutes
- You need
- An active workspace
- Next step
- Open Architecture Studio
What policies do—and do not do
Section titled “What policies do—and do not do”Policies can:
- identify a configuration that is blocked or needs review;
- require approval before an apply workflow;
- run selected security scanners;
- define whether exceptions can be requested; and
- preserve evidence about the decision.
Policies do not:
- replace cloud-provider permissions;
- prove that an architecture is correct in every respect;
- turn a successful plan into deployment approval; or
- let a project silently weaken a mandatory organization baseline.
The page shows the organization policy baseline inherited by the project. Project choices should add the right controls for this workload.
Before you configure policies
Section titled “Before you configure policies”Confirm:
- at least one workspace exists;
- you are allowed to manage project policies;
- your organization has an expected policy baseline;
- the right people can review plans or exceptions; and
- you understand whether the first workspace is non-production or production.
If no workspace exists, you can save a policy draft but cannot apply the guardrails. Return to Set up a workspace.
Open Policy Guardrails
Section titled “Open Policy Guardrails”- Continue from the workspace setup or open Configure Policies in project setup.
- Confirm the page title is Policy Guardrails.
- Read the organization-baseline notification.
- Confirm the progress row shows Policy packs, Deployment controls, Exceptions, and Review.
- Wait until Policy readiness reports that settings are loaded.
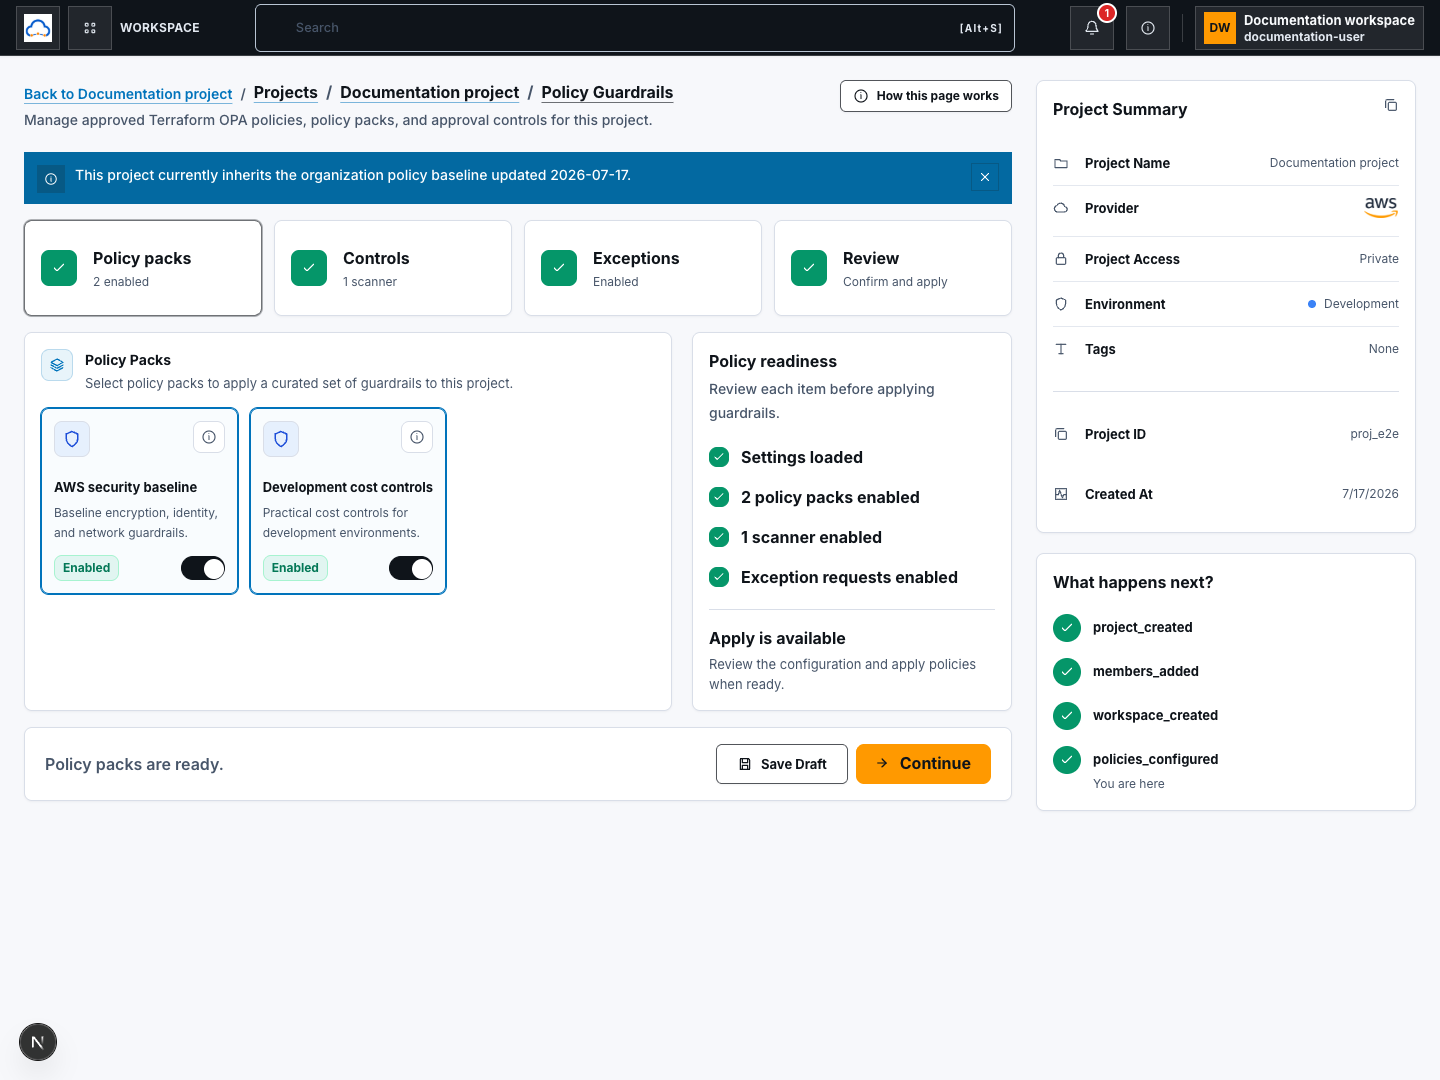
Step 1: Policy packs
Section titled “Step 1: Policy packs”A policy pack is a curated group of related guardrails.
- Read each available pack name and description.
- Use the details action when you need to see what a pack checks.
- Enable the packs required by your organization or project owner.
- Avoid enabling or disabling a pack simply to remove a warning.
- Check Policy readiness for the number of enabled packs.
- Choose Continue.
If you do not know which packs to select, stop and ask the project or security owner. Do not guess on a production project.
Check your result
Section titled “Check your result”The Policy packs progress card and Policy readiness show the intended enabled pack count.
Step 2: Deployment controls
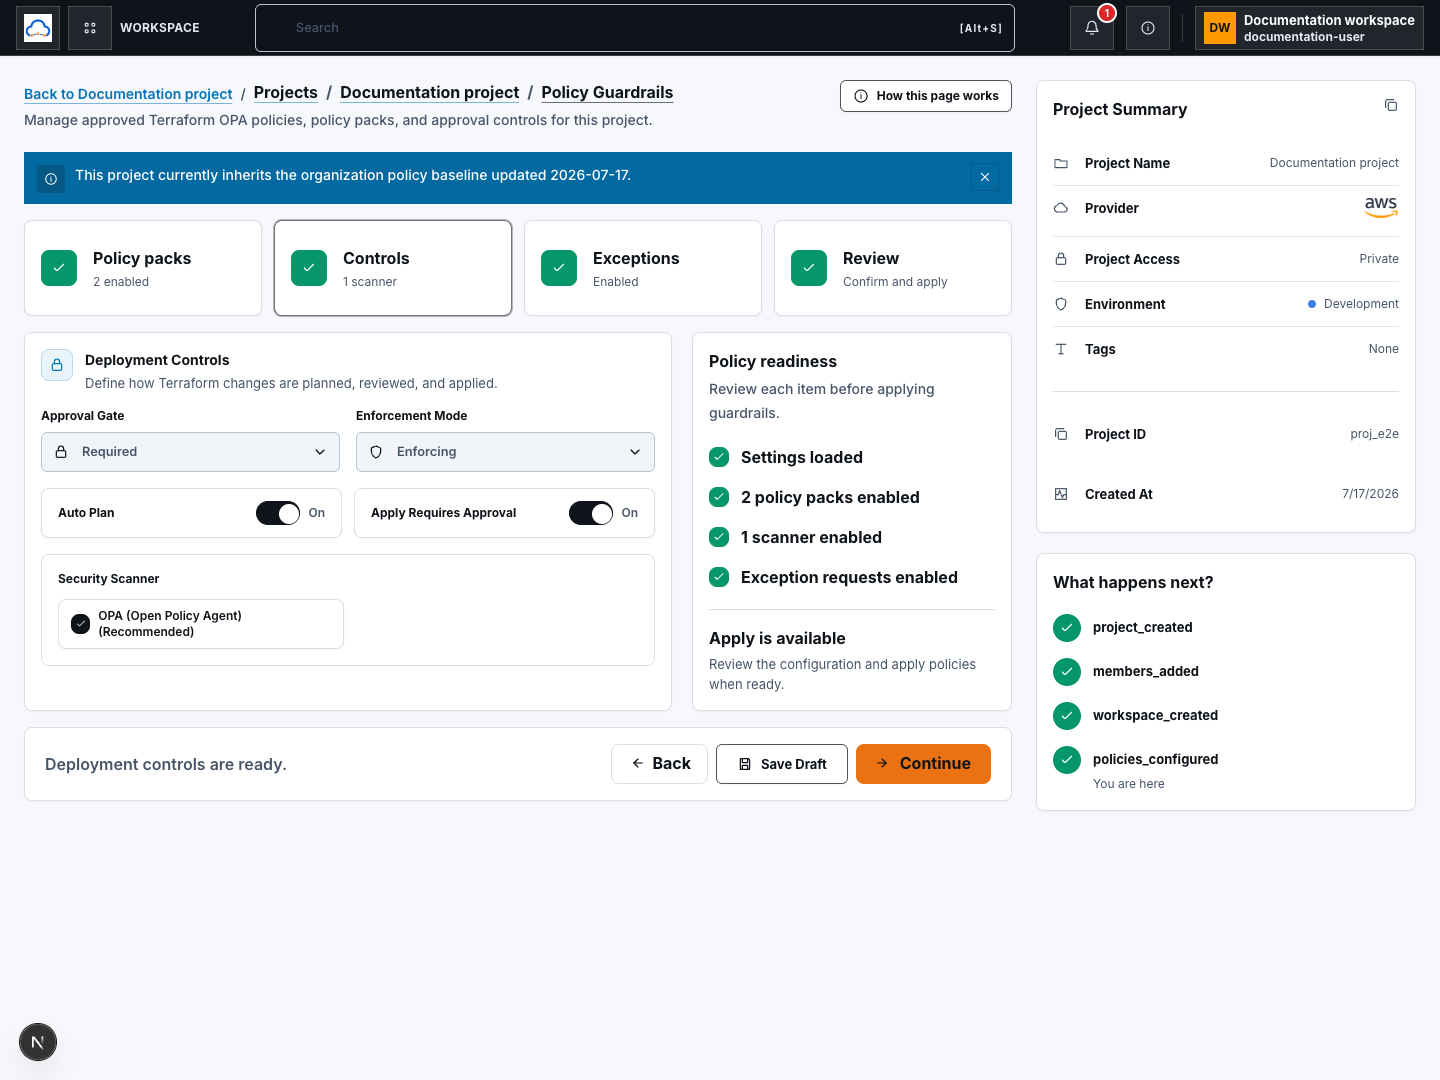
Section titled “Step 2: Deployment controls”Deployment controls define how Terraform changes are checked and approved.
- Choose an Approval Gate:
- Required means the governed workflow must receive approval.
- Optional allows the workflow to continue without a required gate when policy permits.
- Disabled removes this project-level gate and should be used only when explicitly approved.
- Choose an Enforcement Mode:
- Enforcing blocks changes that violate enforced policy.
- Advisory reports findings without using them as the project enforcement boundary.
- Decide whether Auto Plan should be enabled.
- Decide whether Apply Requires Approval should be enabled.
- Review the available Security Scanner engines.
- Enable the scanners required by your security standard.
- Choose Continue.
For a first governed workspace, Required approval and Enforcing mode are the safer defaults unless your organization defines another baseline. The product’s effective organization policy remains authoritative.
Check your result
Section titled “Check your result”The Deployment controls progress card shows the chosen scanner count. Policy readiness no longer reports that settings are loading.
Step 3: Policy exceptions
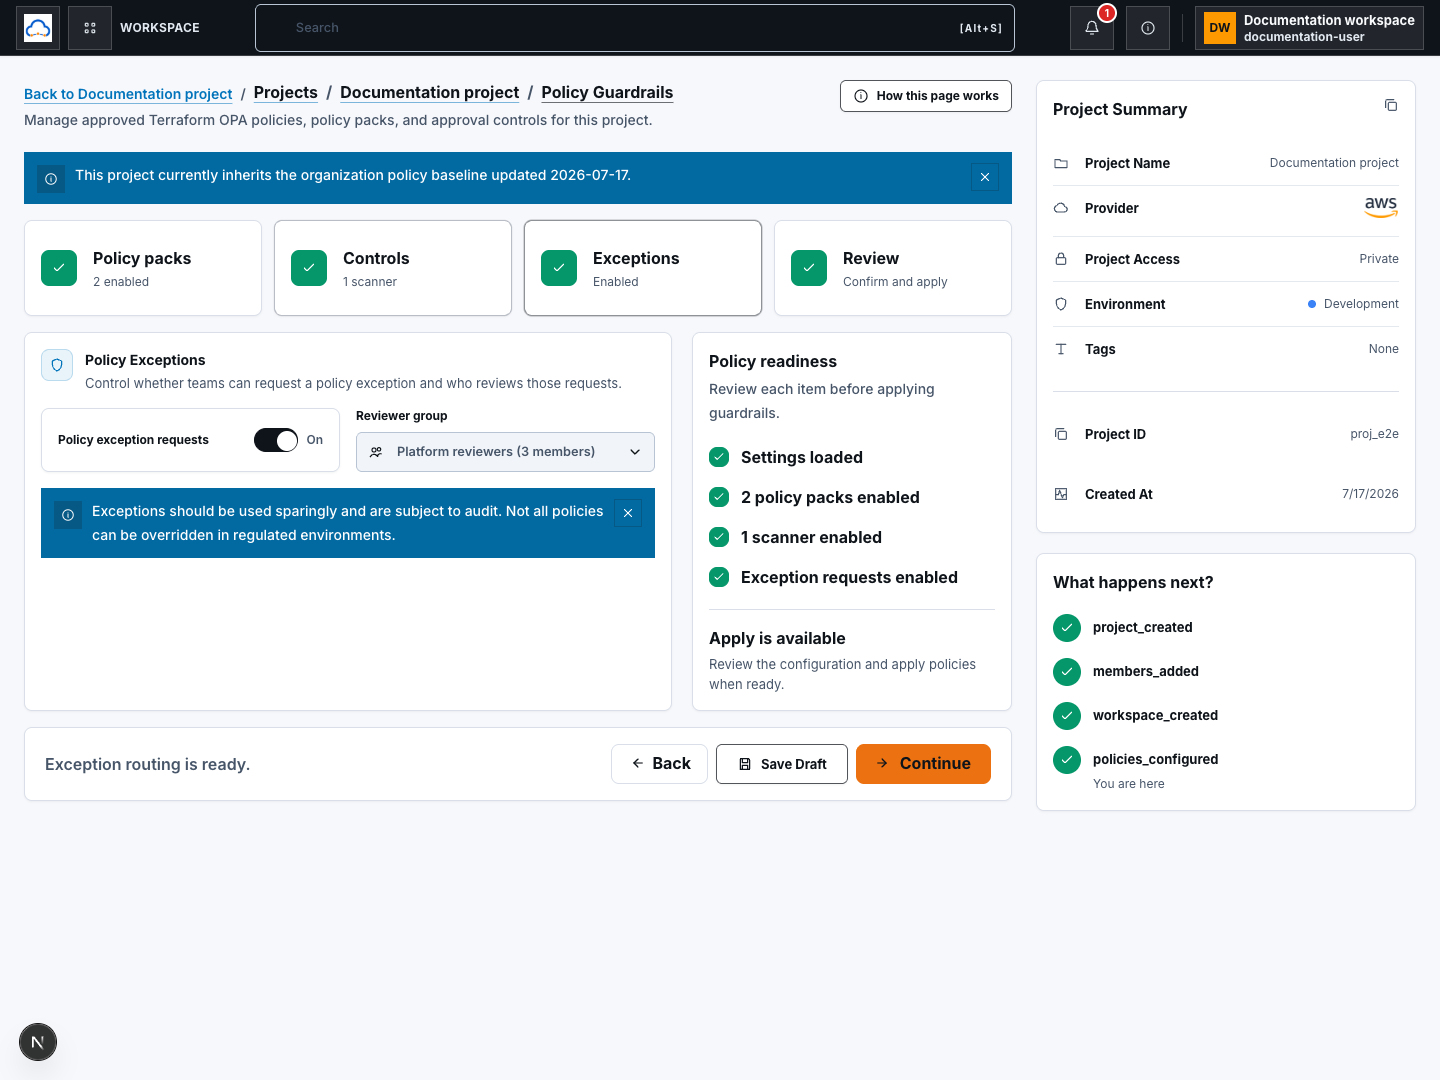
Section titled “Step 3: Policy exceptions”An exception is a reviewed, auditable decision to allow a narrowly scoped policy deviation. It is not a way to hide a failed check.
- Decide whether Policy exception requests should be enabled.
- If enabled, choose a Reviewer group.
- If no reviewer group exists, read the warning and use the approved team-settings flow to create one.
- Confirm the selected reviewers have the responsibility to decide exceptions.
- Read the audit warning.
- Choose Continue.
Exceptions should have a clear business reason, narrow scope, and appropriate expiry. Never include secrets or sensitive customer data in an exception request.
Check your result
Section titled “Check your result”Policy readiness says Exception requests enabled or Exceptions optional, matching the intended configuration.
Step 4: Review, save, or apply
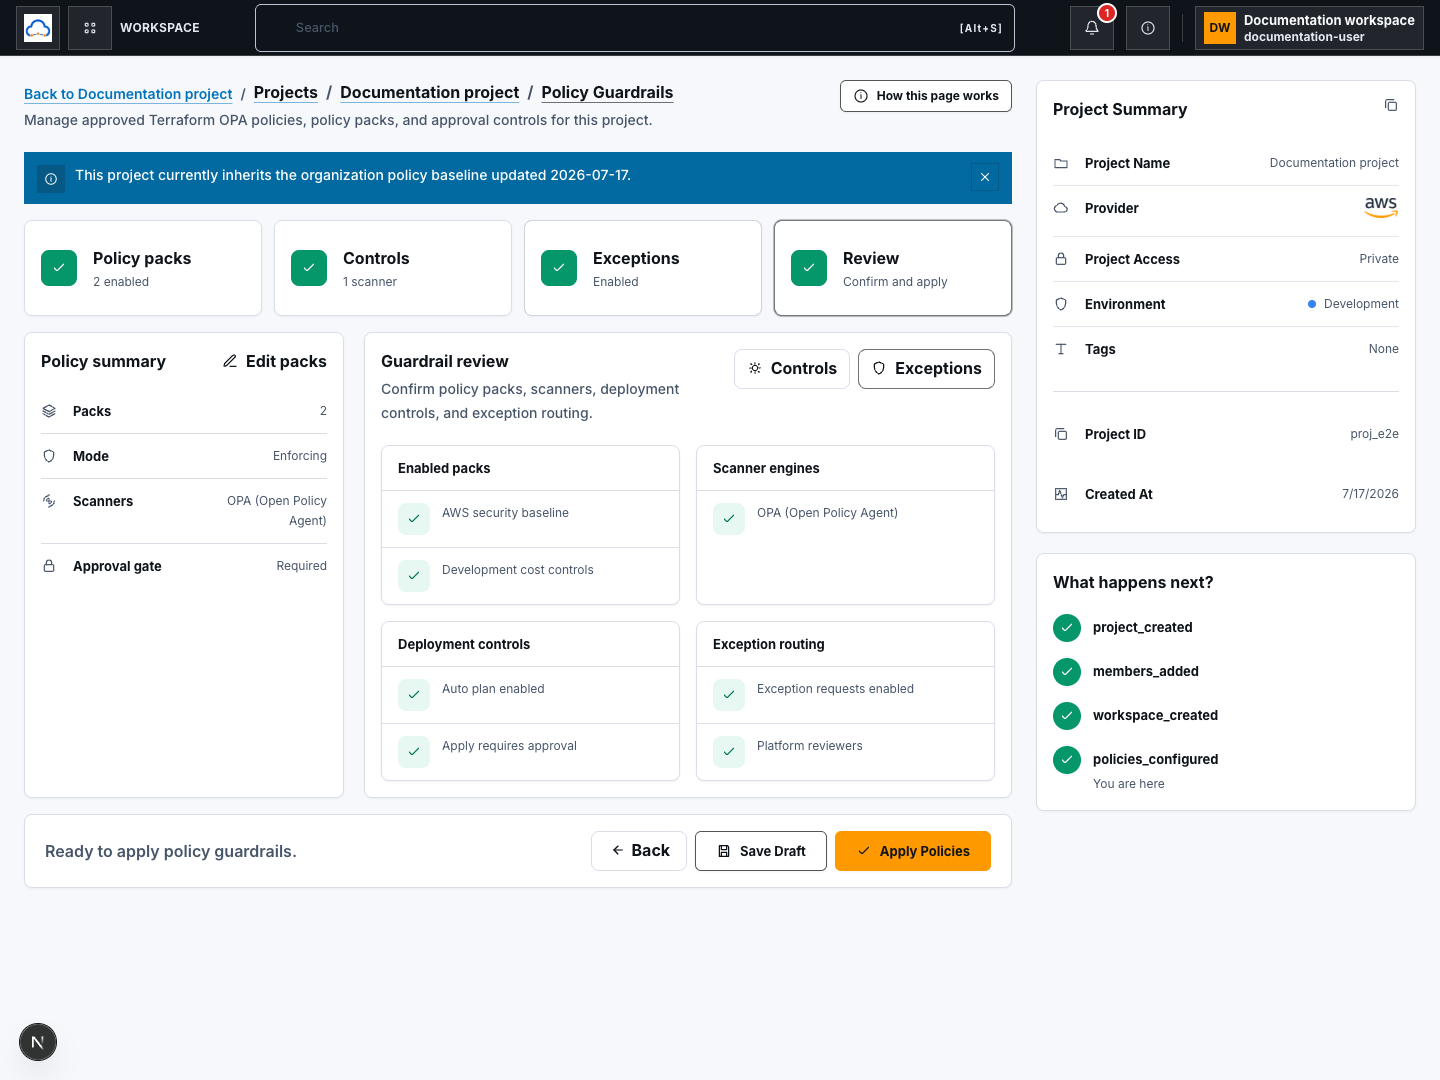
Section titled “Step 4: Review, save, or apply”- Review Policy summary:
- enabled pack count;
- enforcement mode;
- scanners; and
- approval gate.
- Review Guardrail review:
- enabled pack names;
- scanner engines;
- Auto Plan and apply approval behavior; and
- exception routing.
- Correct any mismatch using the edit actions.
- Choose:
- Save Draft to retain the settings without applying them; or
- Apply Policies to apply the project guardrails when a workspace exists and your role allows it.
- Wait for the success notification.
Saving a draft is useful when reviewers still need to confirm the policy configuration. A draft is not evidence that the guardrails are active.
Confirm the policy state
Section titled “Confirm the policy state”The step succeeded when:
- a Policy settings saved notification appears;
- the message says either Policy draft saved or Policy guardrails applied;
- project setup shows the correct completion state; and
- no policy action error is present.
If you saved only a draft, record that approval or application is still required before relying on the settings as active guardrails.
Common blockers
Section titled “Common blockers”Apply Policies is disabled
Section titled “Apply Policies is disabled”Read the reason shown by Policy readiness. Common causes are:
- policy settings are still loading;
- no active workspace exists; or
- another save is in progress.
No reviewer group is available
Section titled “No reviewer group is available”You can apply policies without exception routing when organization rules allow it, then add a reviewer group later. If exceptions are required, create the group through Team & Access before enabling requests.
You do not recognize a policy pack
Section titled “You do not recognize a policy pack”Open its details and ask the project or security owner. Do not disable an unfamiliar control on a production workload.
A policy finding appears later
Section titled “A policy finding appears later”Read the affected resource and remediation. Fix the design when practical. Request an exception only through the configured route and only with a clear, non-sensitive business reason.
Continue
Section titled “Continue”When the final setup step completes, ScrinCloud asks where you want to continue. Choose Architecture Studio for the visual beginner journey.
Continue with Build your first architecture.